Please consider supporting us by disabling your ad blocker. Thank you for your support.
Please consider supporting us by disabling your ad blocker.
Color-Based Object Detection with OpenCV and Python
In this tutorial, we will learn how to perform color-based object detection using OpenCV and Python. We will be using the HSV color space to detect objects in images and videos.
Install the Required Packages
Let's first install the required packages for our project. We will be using OpenCV and Numpy which are pip installable.
pip install opencv-python
pip install numpy
Color Spaces in Computer Vision
Color spaces are used extensively in computer vision applications such as image and video processing, object detection, etc. They allow for efficient and effective processing and analysis of color information.
So basically, color spaces are used to represent colors in a numerical form that can be processed by algorithms. There are many different color spaces, each with its own strengths and weaknesses. Let me quickly explain some of the most commonly used ones:
-
RGB (Red, Green, Blue) color space: This is the most common color space used in computer vision. It is a 3-dimensional color space where colors are created by adding different levels of red, green, and blue.
-
HSV (Hue, Saturation, Value) color space: For color segmentation and color-based object recognition, we use HSV. It is a cylindrical color space that represents colors in terms of their hue, saturation, and value.
-
LAB/Lab* color space: To separate colors into three dimensions, lightness (L*), green-red (a*), and blue-yellow (b*), we use LAB. It is designed to be more perceptually uniform than other color spaces, meaning that the numerical differences between colors more closely correspond to the perceived differences by the human eye.
Why HSV Color Space is Better for Color Detection
Using different color spaces has different advantages depending on the application. For example, HSV is often used for color-based object detection because it separates the color information from the brightness information, making it robust to changes in lighting conditions.
Understand HSV Color Space
As I said above, the HSV color space is a way of representing colors in terms of their Hue, Saturation, and Value.
Hue is the color component. It is represented by a value between 0 and 360 degrees. It is the color that we see in the color wheel (see the image below). For example, red is 0 degrees, green is 120 degrees, and blue is 240 degrees.
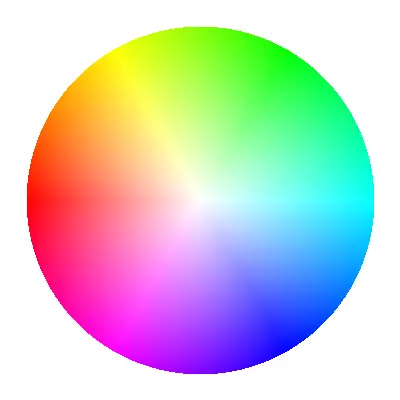
HSV color wheel image source
Saturation is the amount of color present in the color. It is represented by a value between 0% (desaturated) and 100% (saturated) and it refers to how intense or pure the color is.
Value refers to how light or dark the color is and is represented by a value between 0% (black) and 100% (white).
Here is an image of the HSV color space:
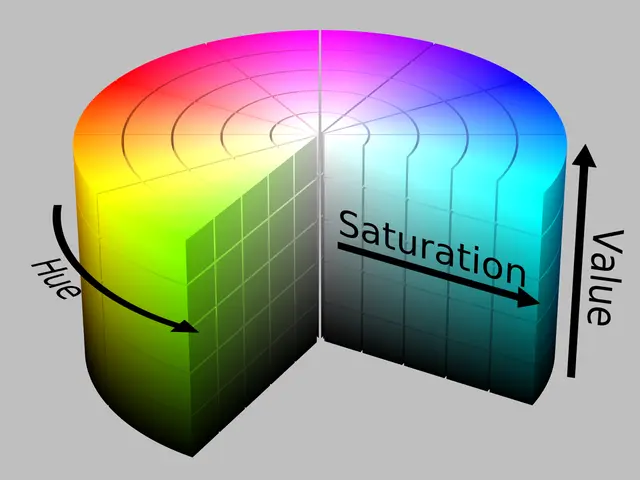
HSV color space image source

Color-Based Object Detection in Images
Let's now see how we can perform color-based object detection in images. Here is the image we will be using:
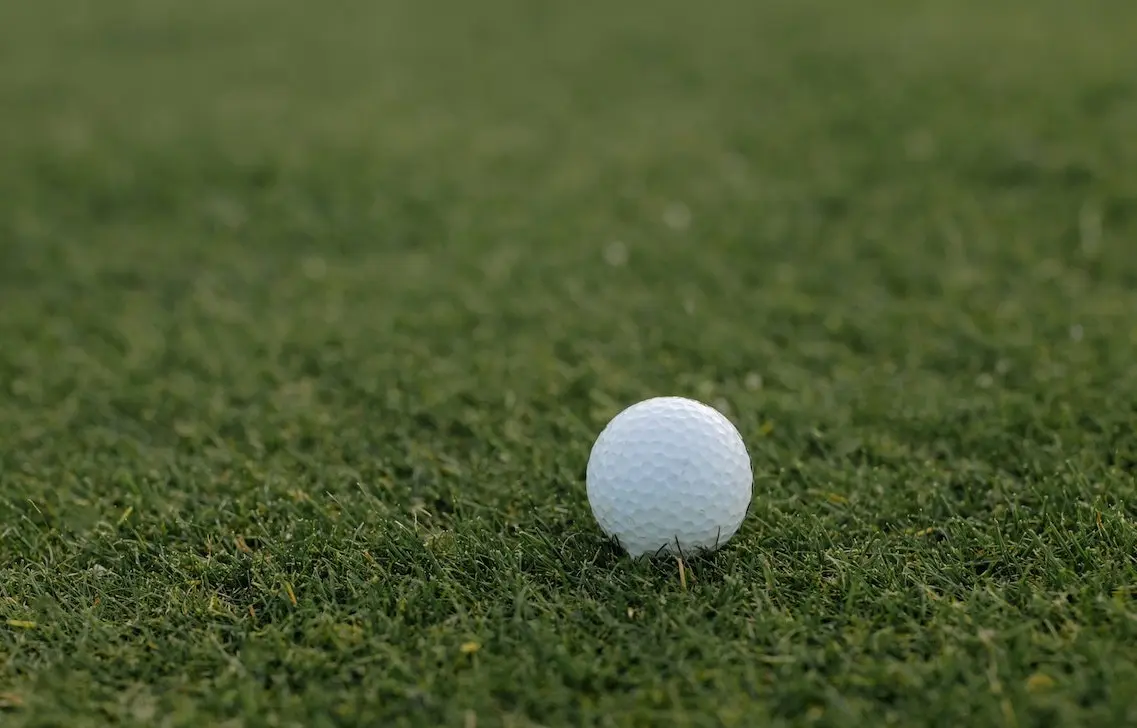
and our goal is to detect the Golf ball in the image.
Let's write some code and get our hands dirty.
Create a new file called color_detection_image.py and add the following code:
import numpy as np
import cv2


# read the image
image = cv2.imread("examples/1.jpg")
# convert from BGR to HSV color space
hsv_image = cv2.cvtColor(image, cv2.COLOR_BGR2HSV)
The first step is to read the image and convert it from BGR to HSV color space. We can do this using the cv2.cvtColor() function and use the cv2.COLOR_BGR2HSV flag to convert from BGR to HSV color space.
Now, let's define the range of colors we want to detect. For this example, we will detect the color white of the ball.
We can do this by defining the lower and upper bounds of the HSV color space.
For the white color, the lower bound is (75, 0, 99) and the upper bound is (179, 62, 255). You can change these values to detect other colors.
But you might be wondering how to find these values.
Well, I have created a simple Python script (an HSV color picker) that allows you to find the HSV values of any color you want. You can use it on images or videos. The script is available with the source code of this tutorial.
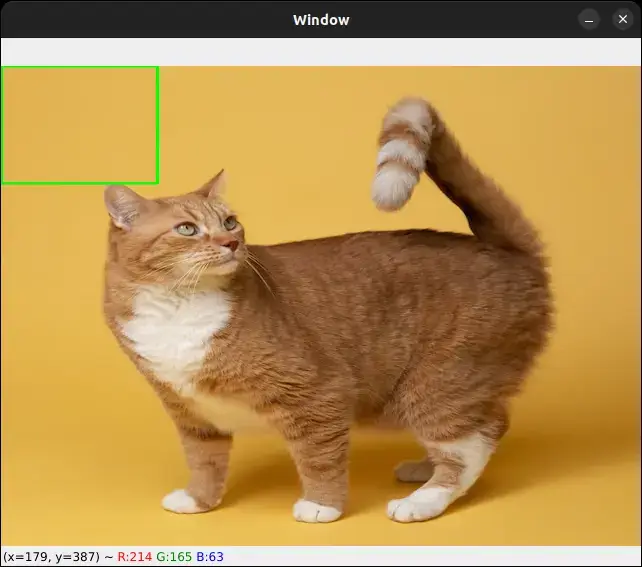
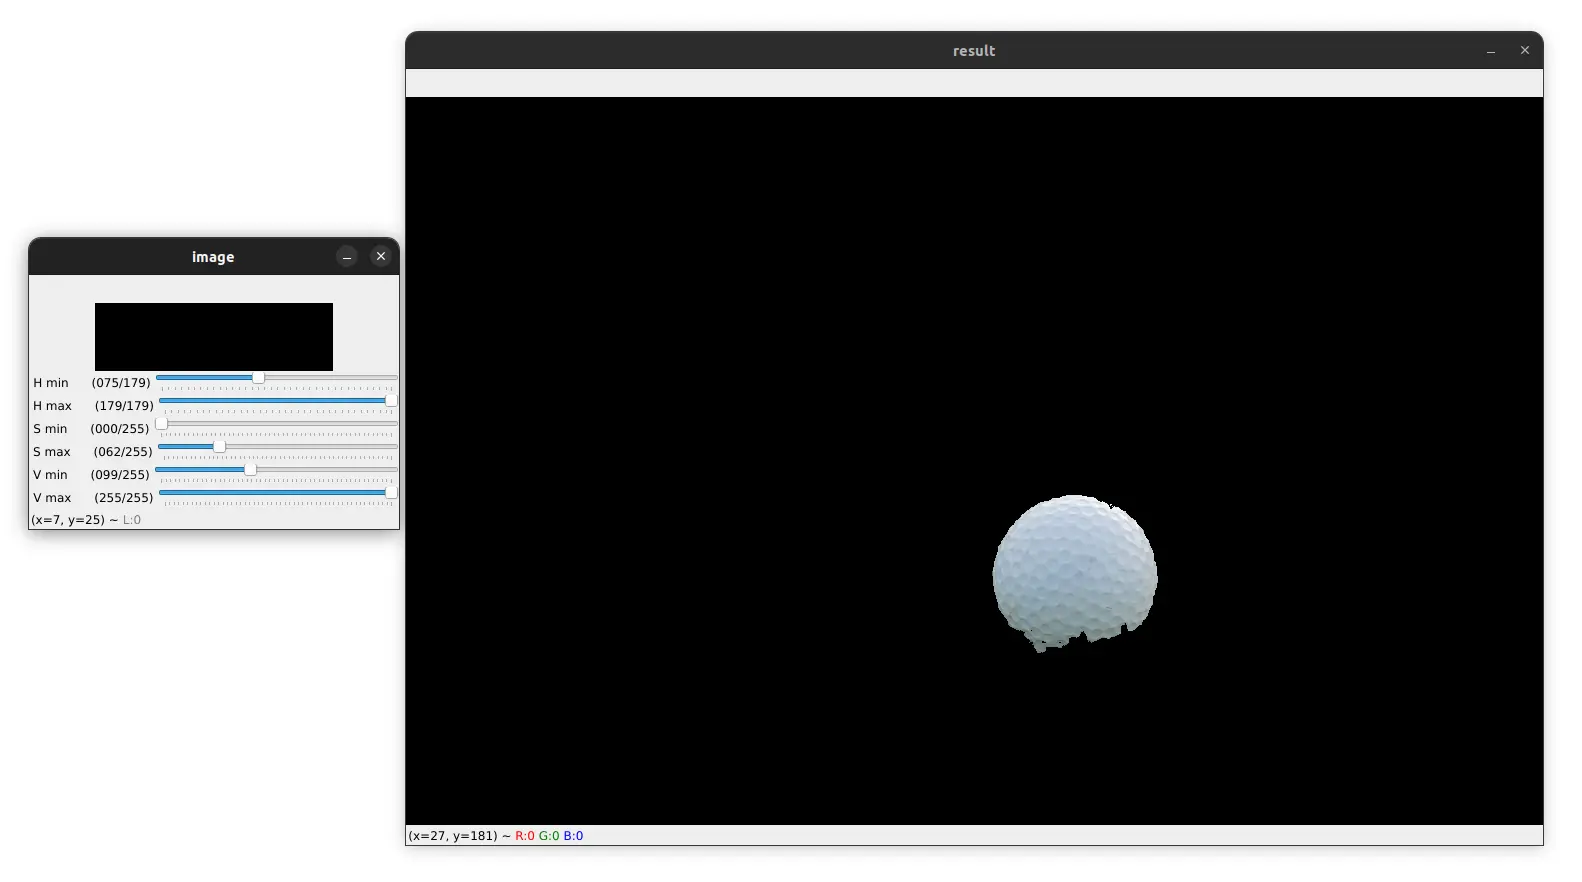
So, to get the lower and upper limits of the white Golf ball from the image above, we can run the hsv_color_picker_images.py script and then adjust the values until we get the desired result.
Here is an example with our image:
Now, let's use these values to create a mask for the image:
# lower and upper limits for the white color
lower_limit = np.array([75, 0, 99])
upper_limit = np.array([179, 62, 255])

# create a mask for the specified color range
mask = cv2.inRange(hsv_image, lower_limit, upper_limit)
# get the bounding box from the mask image
bbox = cv2.boundingRect(mask)
We can use the cv2.inRange() function to create a mask for the specified color range.
The function takes the HSV image and the lower and upper limits of the color range as input and returns a binary mask image.
We can then use the cv2.boundingRect() function to get the bounding box of the object in the image.
This function takes the mask image as input and returns the bounding box coordinates (x, y, w, h), where (x, y) is the top-left corner of the bounding box and (w, h) is the width and height of the bounding box.
Now, let's draw the bounding box on the image:
# if we get a bounding box, use it to draw a rectangle on the image
if bbox is not None:
    print("Object detected")
    x, y, w, h = bbox
    cv2.rectangle(image, (x, y), (x + w, y + h), (0, 255, 0), 2)
else:
    print("Object not detected")

cv2.imshow('image', image)
cv2.waitKey(0)
We check if the bbox variable is not empty and if it is not, we draw a rectangle on the image using the cv2.rectangle() function.
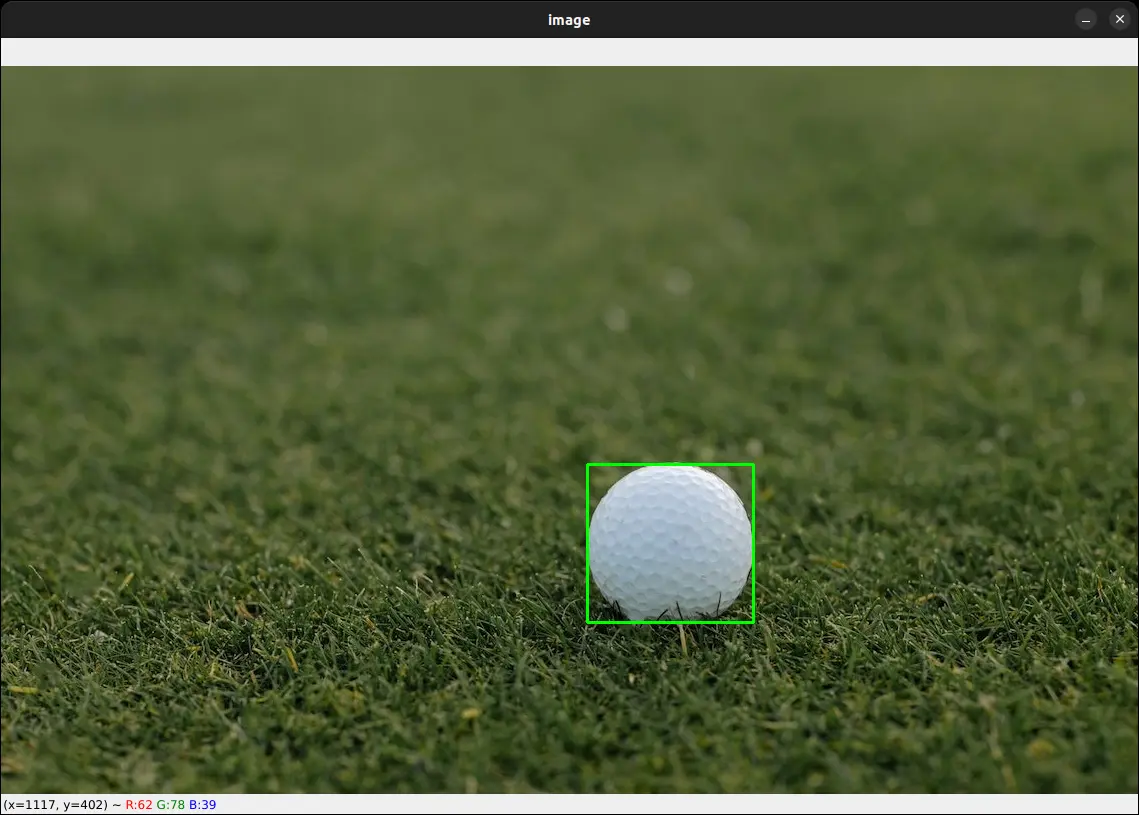
Let's run the code and see the result:

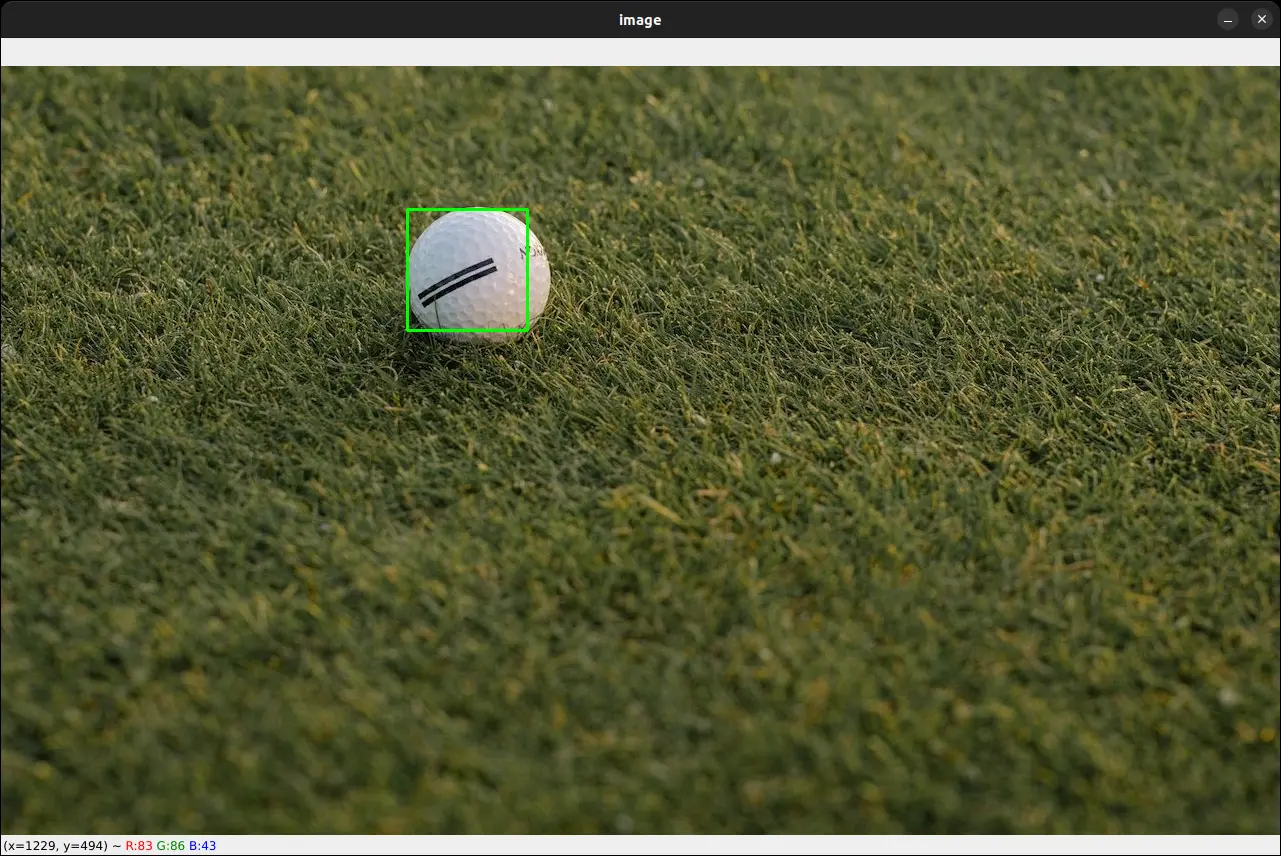
As you can see, the code works well and detects the Golf ball in the image. Can we detect the Golf ball in other images? Let's try it:
Here again, the Golf ball is detected.
But as we can expect, this does not work all the time. For example, if there are other white objects in the image, the code will not work as expected:
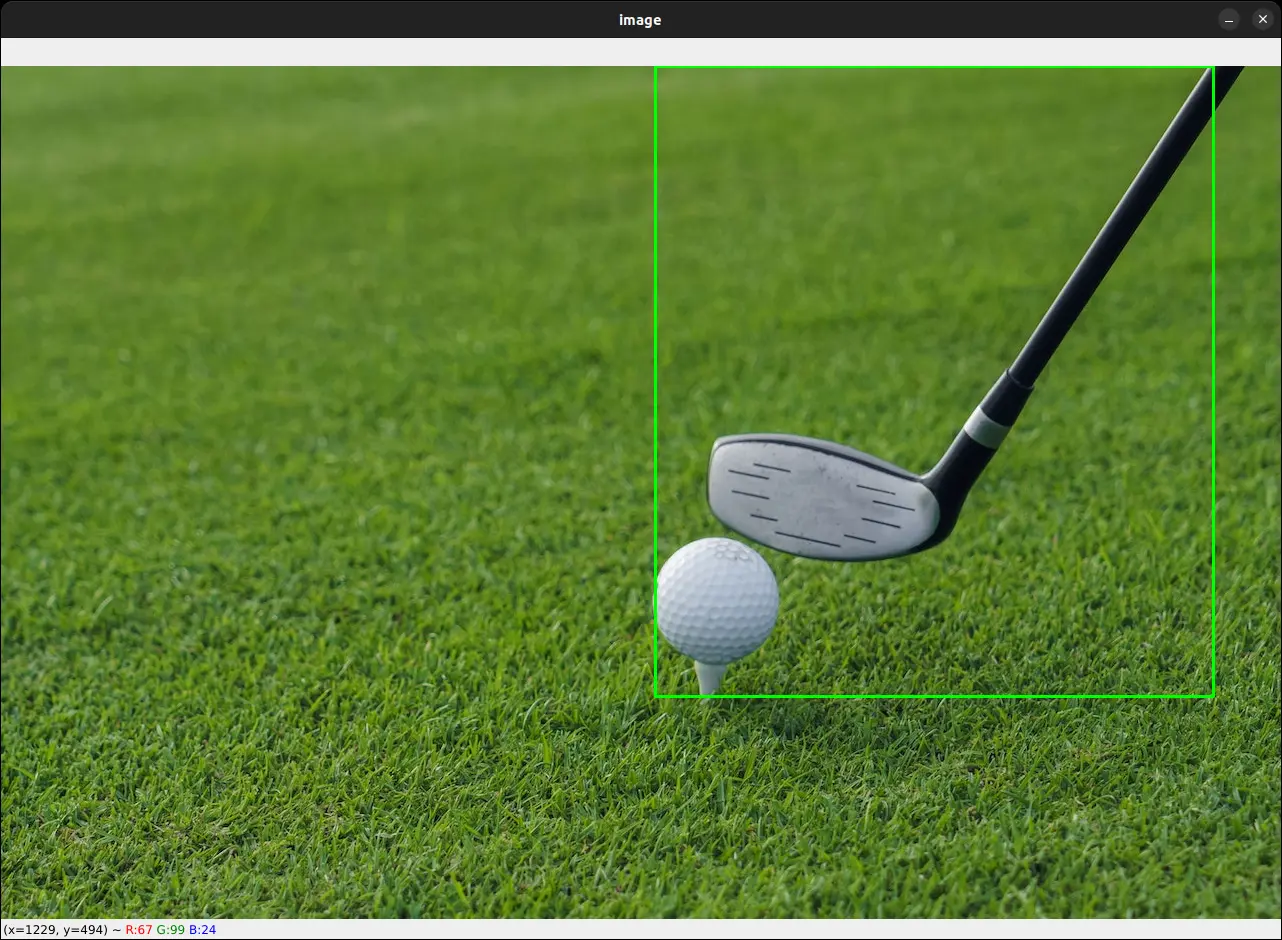
Here since the Golf bat is white, it is detected with the Golf ball. So just keep in mind this limitation when using this method.
We are using the color to detect the object, so if there are other objects with the same color, they will be detected as well.
Color-Based Object Detection in Videos
Now, let's see how we can perform color-based object detection in videos.
Create a new Python file called color_detection_video.py and add the following code:
import numpy as np
import cv2


# initialize the video capture object
cap = cv2.VideoCapture("examples/1.mp4")

# grab the width, height, and fps of the frames in the video stream.
frame_width = int(cap.get(cv2.CAP_PROP_FRAME_WIDTH))
frame_height = int(cap.get(cv2.CAP_PROP_FRAME_HEIGHT))
fps = int(cap.get(cv2.CAP_PROP_FPS))

# initialize the FourCC and a video writer object
fourcc = cv2.VideoWriter_fourcc(*'XVID')
output = cv2.VideoWriter('output.mp4', fourcc, fps, (frame_width, frame_height))
The first step is to initialize the video capture object using the cv2.VideoCapture() function. We pass the path to the video file as input.
Then we get the width, height, and fps of the frames in the video stream using the cv2.CAP_PROP_FRAME_WIDTH, cv2.CAP_PROP_FRAME_HEIGHT, and cv2.CAP_PROP_FPS properties of the cv2.VideoCapture object.
We can then initialize the cv2.VideoWriter object to write the output video. We pass the path to the output video file, the FourCC code, the fps, and the width and height of the frames as input.
Now, let's read the video frame by frame and perform color-based object detection:
while True:
    ret, frame = cap.read()

    if not ret:
        print("There is no more frame to read, exiting...")
        break

    # convert from BGR to HSV color space
    hsv_frame = cv2.cvtColor(frame, cv2.COLOR_BGR2HSV)
After reading the video, we loop over the frames and check if the frame was read successfully using the ret variable. If the frame was not read successfully, we print a message saying that there are no more frames to read and exit the loop.
If the frame was read successfully, we convert the color space of the frame from BGR to HSV using the cv2.cvtColor() function.
Now, let's define the range of colors we want to detect. In the video, we have a blue ball.
    # lower and upper limits for the blue color
    lower_limit = np.array([99, 135, 51])
    upper_limit = np.array([116, 226, 255])

    mask = cv2.inRange(hsv_frame, lower_limit, upper_limit)
    bbox = cv2.boundingRect(mask)

    # if we get a bounding box, use it to draw a rectangle on the image
    if bbox is not None:
        x, y, w, h = bbox
        cv2.rectangle(frame, (x, y), (x + w, y + h), (0, 255, 0), 2)
    else:
        print("Object not detected")

    cv2.imshow('frame', frame)
    # write the frame to the output file
    output.write(frame)
    if cv2.waitKey(30) == ord('q'):
        break

cap.release()
output.release()
cv2.destroyAllWindows()
So as before, we define the lower and upper limits of the HSV color space for the blue color. We then create a mask for the specified color range and get the bounding box of the object in the frame.
We then draw a rectangle on the frame using the bounding box coordinates (if the bounding box is not empty) and display the frame.
Finally, we write the frame to the output video file and check if the user pressed the q key. If so, we exit the loop.
Below is our final result:
Our simple code works well and detects the blue ball in the video!
Conclusion
In this tutorial, we covered the basics of color-based object detection using OpenCV and Python.
We have learned about color spaces and how they are used in computer vision applications, and why the HSV color space is often preferred for color-based object detection.
We have also seen how to perform color-based object detection in images using OpenCV and Python.
What we've covered here is just the tip of the iceberg when it comes to object detection.
If you're interested in taking your skills to the next level and learning how to build an automatic number plate recognition system, then you might want to check out my book, Mastering YOLO.
This comprehensive guide will take you through the entire process, from understanding the fundamentals of YOLO to training your own custom model for license plate recognition.
Hope you enjoyed this tutorial and learned something new.
The code for this tutorial is available here.
If you have any questions, feel free to ask them in the comments section below.
Previous Article
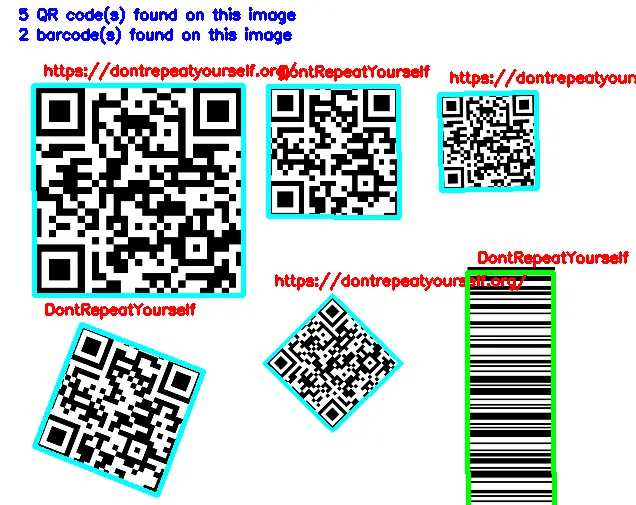
Barcode and QR Code Scanner with OpenCV and Python
Next Article