Please consider supporting us by disabling your ad blocker. Thank you for your support.
Please consider supporting us by disabling your ad blocker.
Bitwise Operations and Image Masking with OpenCV
In this tutorial, we are going to see how to use the bitwise operations AND, OR, XOR, and NOT.
Bitwise operations are used in image processing to extract a Region of Interest (ROI) from an image.
This article is part 7 of the tutorial series on computer vision and image processing with OpenCV:
- How to Read, Write, and Save Images with OpenCV and Python
- How to Read and Write Videos with OpenCV and Python
- How to Resize Images with OpenCV and Python
- How to Crop Images with OpenCV and Python
- How to Rotate Images with OpenCV and Python
- How to Annotate Images with OpenCV and Python (coming soon)
- Bitwise Operations and Image Masking with OpenCV and Python (this article)
- Image Filtering and Blurring with OpenCV and Python
- Image Thresholding with OpenCV and Python
- Morphological Operations with OpenCV and Python
- Edge and Contour Detection with OpenCV and Python
Bitwise AND
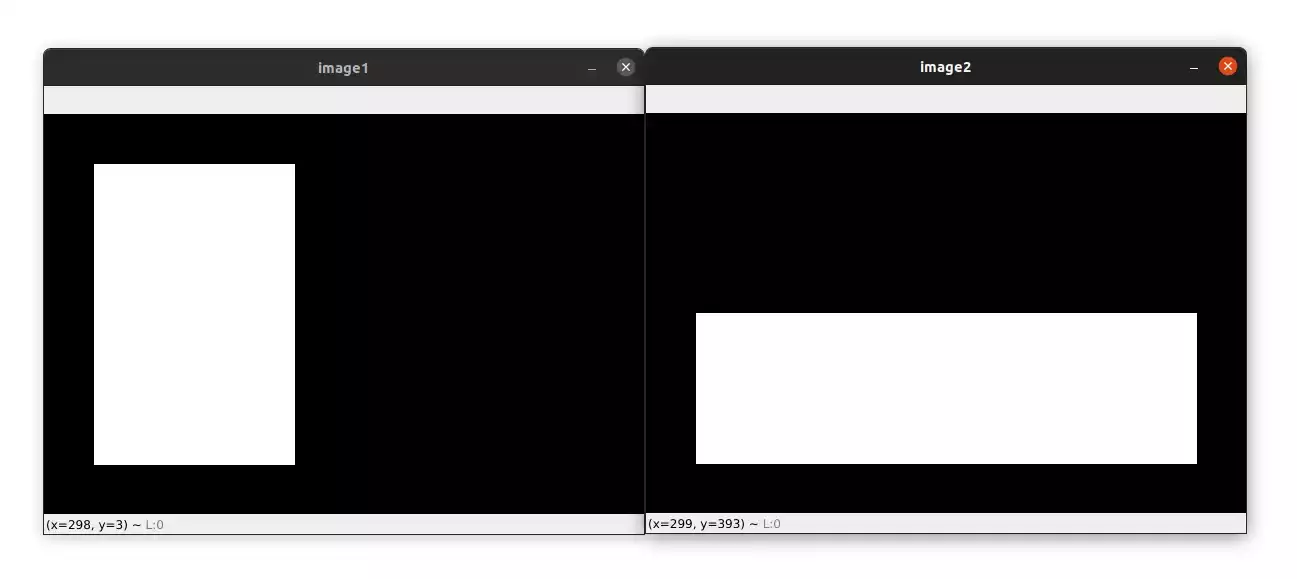
In order to apply bitwise operations, let's first create two black images one with a vertical white rectangle and the other with a horizontal white rectangle:
import cv2
import numpy as np

# draw a vertical rectangle
image1 = np.zeros((400, 600), dtype="uint8")
cv2.rectangle(image1, (50, 50), (250, 350), 255, -1)

# draw a horizontal rectangle
image2 = np.zeros((400, 600), dtype="uint8")
cv2.rectangle(image2, (50, 200), (550, 350), 255, -1)

cv2.imshow("image1", image1)
cv2.imshow("image2", image2)
cv2.waitKey(0)
To create a black image, we use the np.zeros function. This function will create a (400, 600) image full of zeros (a black image).
In the first black image, we draw a vertical white rectangle using the cv2.rectangle function.
This white rectangle has a width of 250 - 50 = 200 and a height of 350 - 50 = 300.
In the second black image, we draw a horizontal white rectangle with a width of 550 - 50 = 500 and a height of 350 - 200 = 150.
The two images are shown below:
To apply bitwise AND we can use the cv2.bitwise_and function. Let's see how to do it:
bitwise_and = cv2.bitwise_and(image1, image2)
cv2.imshow("bitwise_and", bitwise_and)
cv2.waitKey(0)
The cv2.bitwise_and function calculates the per-element bit-wise conjunction of two arrays. Meaning that the function will compare each pixel in image1 with its corresponding pixel in image2.
If both pixels are greater than 0 the function outputs a value greater than 0, in our case 255 (white color), and if one of the two pixels is equal to 0 the function outputs 0.
Take a look at the code below to understand better:
>>> a = np.array([255])   # both pixels are
>>> b = np.array([255])   # greater than 0
>>> cv2.bitwise_and(a, b) # => output 255
array([[255]], dtype=int32)

>>> a = np.array([0]) # one of the two pixels is equal to 0
>>> b = np.array([255])
>>> cv2.bitwise_and(a, b) # => output 0
array([[0]], dtype=int32)
The output image of the bitwise_and function is shown below:
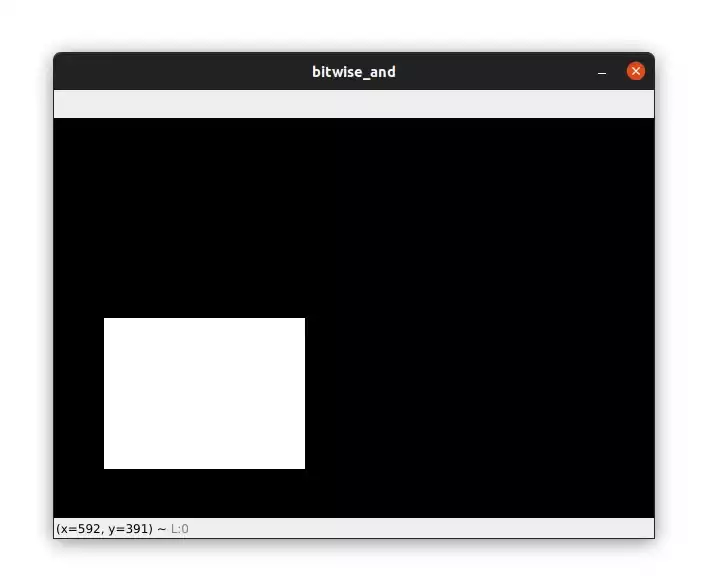
As you can see, the only region that is left white (255) is the region where the two rectangles overlap, everything else is black (0).
Bitwise OR
To apply bitwise OR we can use the cv2.bitwise_or function:
bitwise_or = cv2.bitwise_or(image1, image2)
cv2.imshow("bitwise_or", bitwise_or)
cv2.waitKey(0)
The cv2.bitwise_or function calculates the per-element bit-wise disjunction of two arrays.
Meaning that if either pixel in image1 or image2 is greater than 0, the function outputs a pixel value of 255 (white), otherwise it outputs 0.
take a look at the code below to understand better:
>>> a = np.array([255])  # both pixels are
>>> b = np.array([255])  # greater than 0
>>> cv2.bitwise_or(a, b) # => output 255
array([[255]], dtype=int32)

>>> a = np.array([0])    # one of the two pixels
>>> b = np.array([255])  # is greater than 0
>>> cv2.bitwise_or(a, b) # => output 255
array([[255]], dtype=int32)

>>> a = np.array([0])    # both pixels are
>>> b = np.array([0])    # equal to 0
>>> cv2.bitwise_or(a, b) # => output 0
array([[0]], dtype=int32)
The resulting image of the bitwise_or function is shown below:
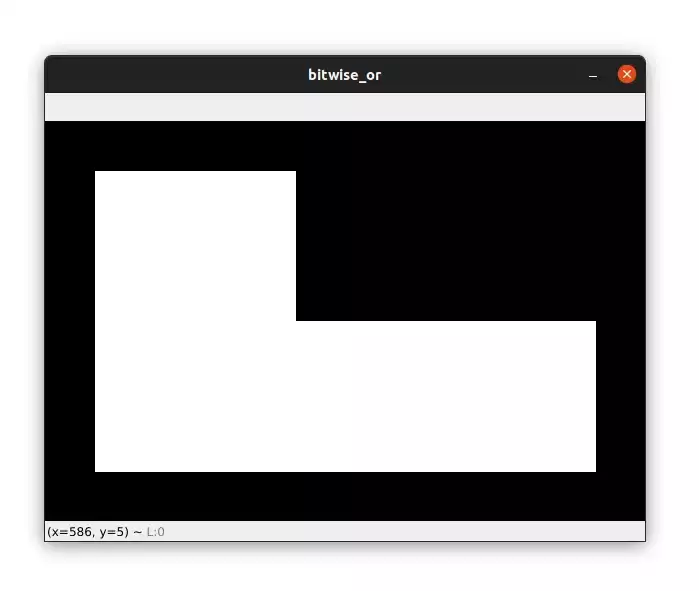
You can see that the two rectangles are combined.

Bitwise XOR
Next, is the bitwise XOR using the cv2.bitwise_xor:
bitwise_xor = cv2.bitwise_xor(image1, image2)
cv2.imshow("bitwise_xor", bitwise_xor)
cv2.waitKey(0)
The cv2.bitwise_xor function calculates the per-element bit-wise "exclusive or" operation on two arrays.
Meaning that if one of the two pixels is greater than 0, the function outputs a pixel value of 255 (white) but if both pixels are greater than 0 or both are equal to 0, the function outputs 0.
take a look at the code below to understand better:
>>> a = np.array([255])   # both pixels are
>>> b = np.array([255])   # greater than 0
>>> cv2.bitwise_xor(a, b) # => output 0
array([[0]], dtype=int32)

>>> a = np.array([0])
>>> b = np.array([255])   # one of the two pixels is greater than 0
>>> cv2.bitwise_xor(a, b) # => output 255
array([[255]], dtype=int32)

>>> a = np.array([0])     # both pixels are
>>> b = np.array([0])     # equal to 0
>>> cv2.bitwise_xor(a, b) # => output 0
array([[0]], dtype=int32)
You can see in the first case that if both pixels are greater than 0, the function outputs 0.
The output image of the bitwise_xor function is shown below:
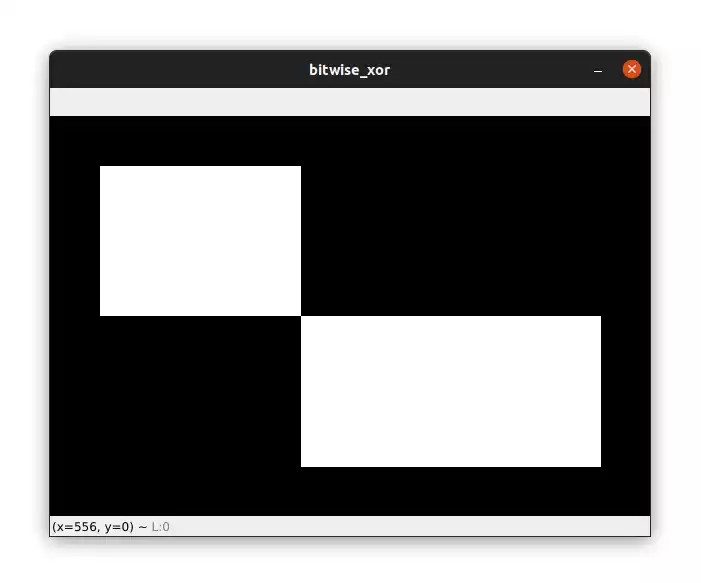
As you can see, the region where the two rectangles overlap has been removed (black) because in this region both pixels are greater than 0.
Bitwise NOT
Finally, let's see the bitwise NOT operation using the cv2.bitwise_not function:
bitwise_not = cv2.bitwise_not(image1)
cv2.imshow("bitwise_not", bitwise_not)
cv2.waitKey(0)
The cv2.bitwise_not function calculates the per-element bit-wise inversion of the input array. So every pixel with a value of 255 becomes 0, and every pixel with a value of 0 becomes 255:
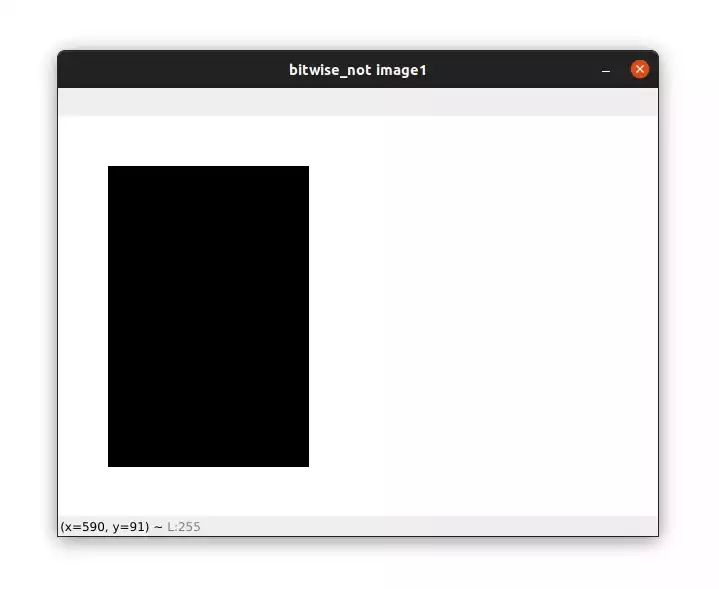
As you can see, the black part of the image (pixels = 0) becomes white (pixels = 255) and the white part of the image becomes black.
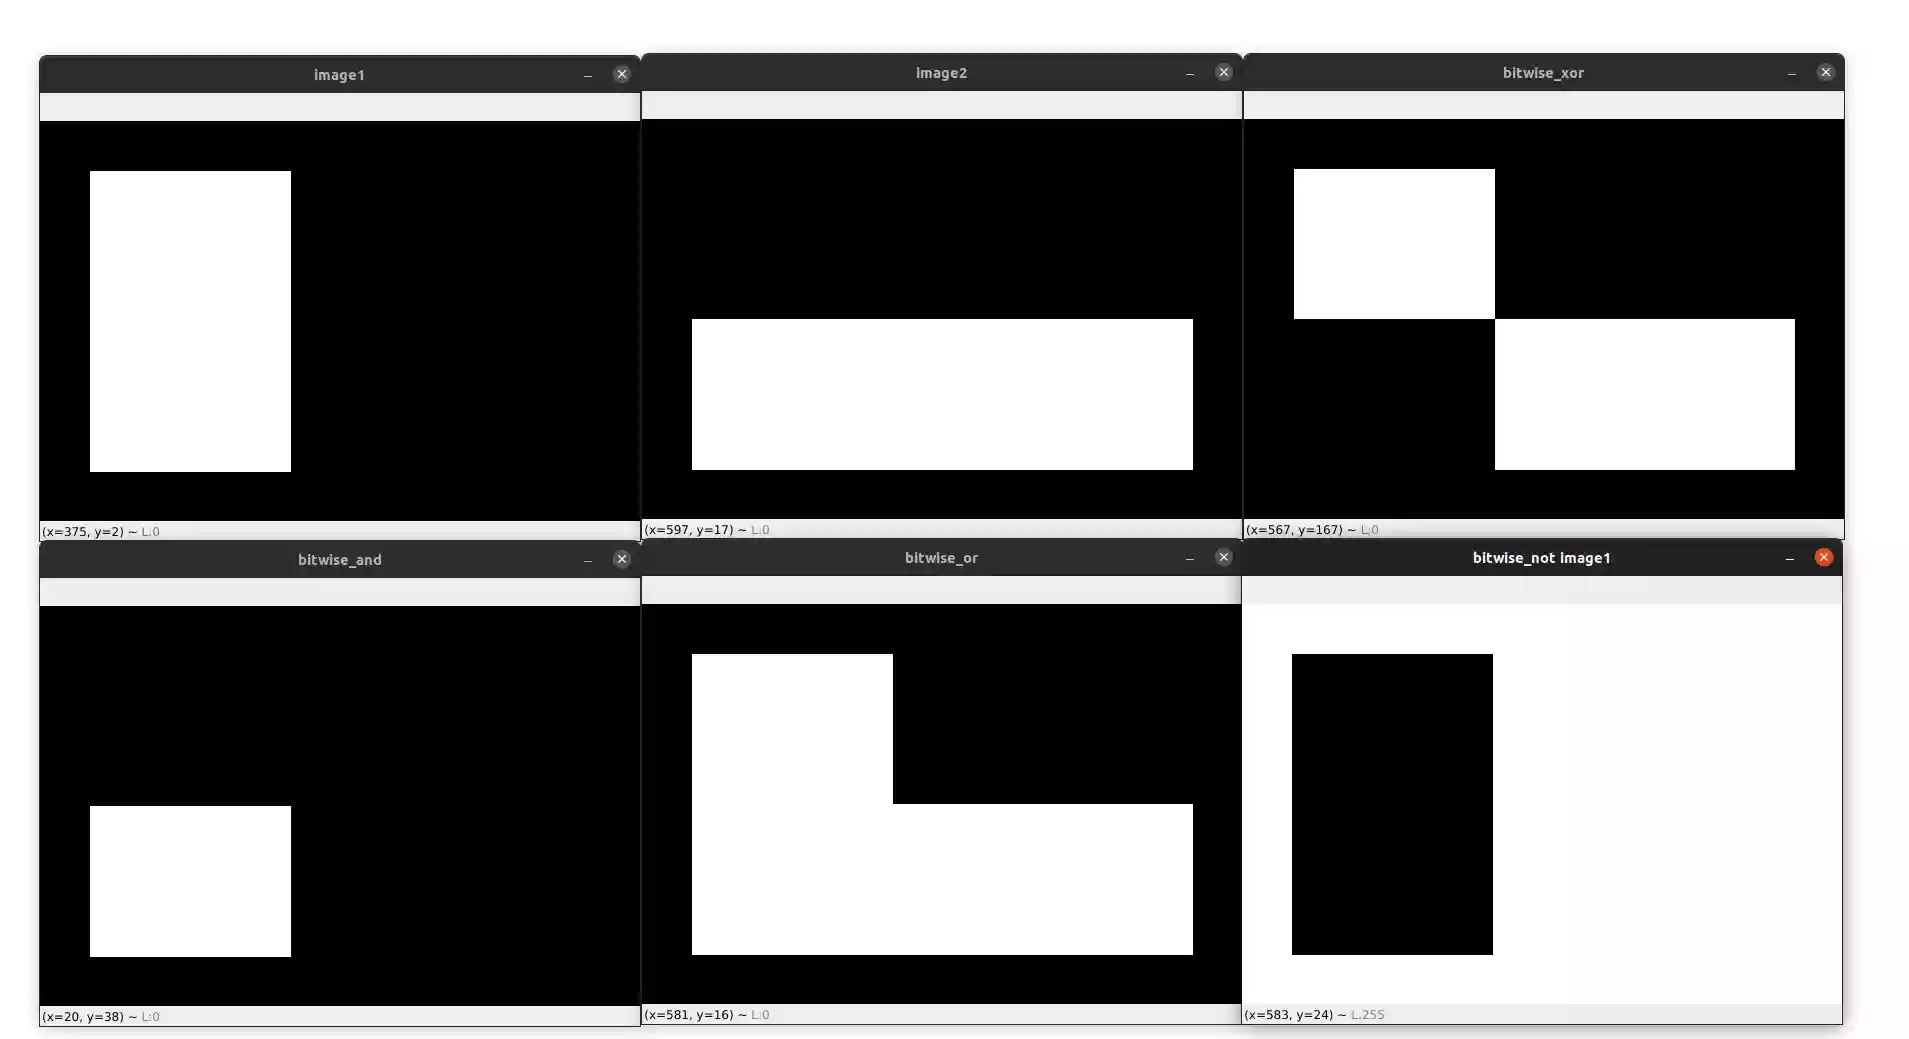
I added all bitwise operations in one image so that you can compare between them. Take a look at the image below:

Image Masking
Now that you know how to use bitwise functions, we can see how to combine them with image masking to extract a region of interest from an image.
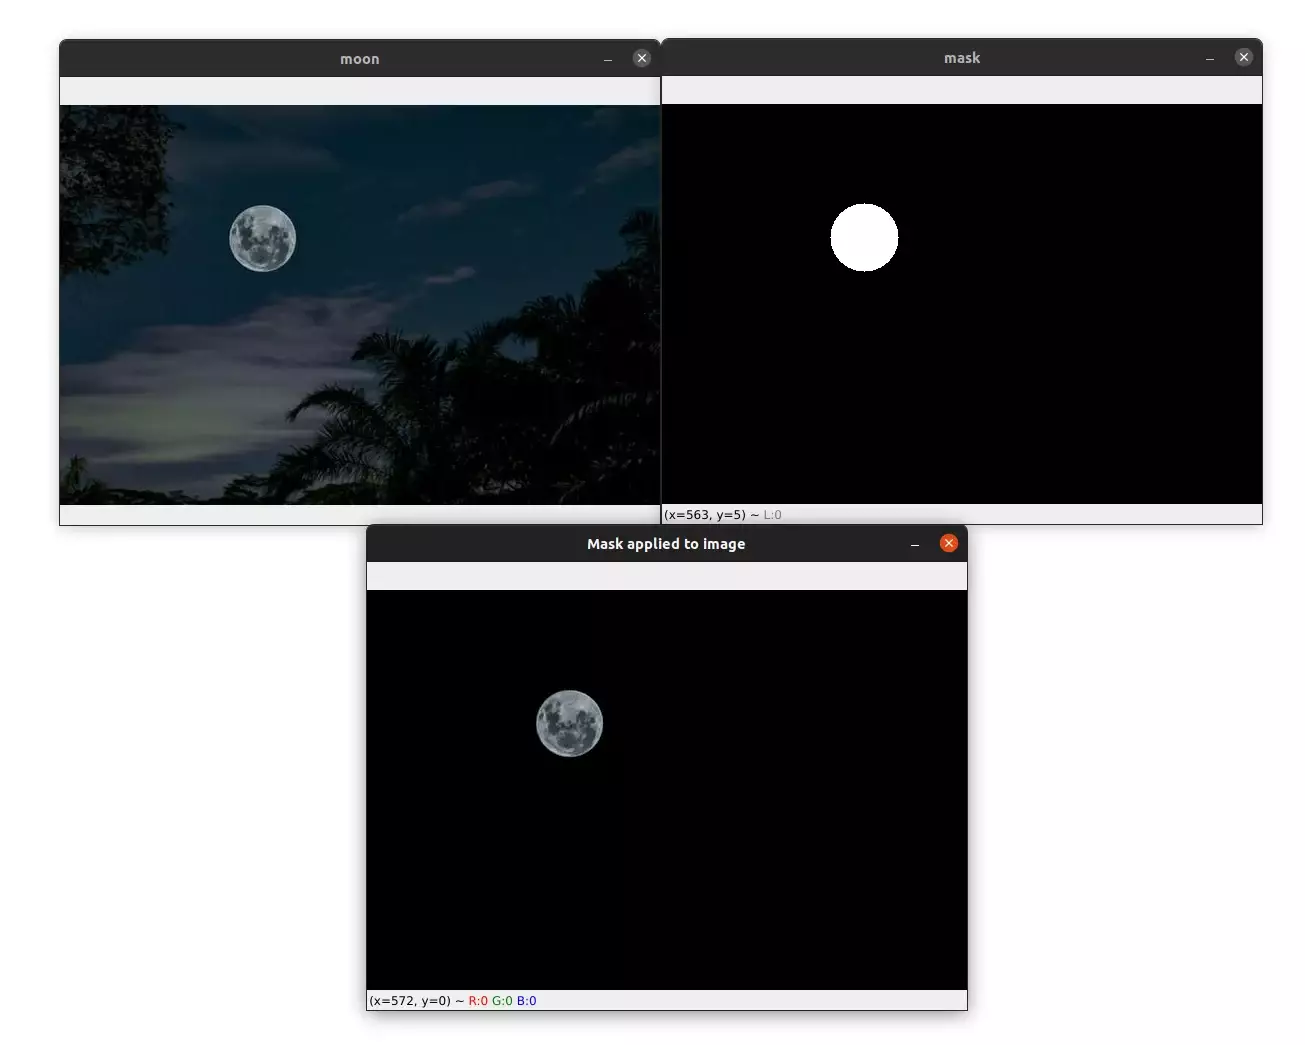
Let's say we want to use the image below and extract only the region of the image that contains the moon.
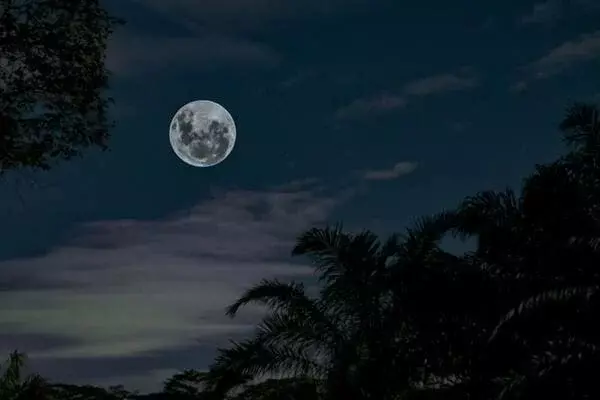
Let's write some code to see how to do it:
moon = cv2.imread("moon.jpg")

# create a black image with the same size as our
# image that contains the moon, we then create
# a white circle on the black image
mask = np.zeros(moon.shape[:2], dtype="uint8")
cv2.circle(mask, (202, 133), 34, 255, -1)

# apply the mask to our image
masked = cv2.bitwise_and(moon, moon, mask=mask)

cv2.imshow("moon", moon)
cv2.imshow("mask", mask)
cv2.imshow("Mask applied to image", masked)
cv2.waitKey(0)
We start by loading our image from disk.
We then create a black image of the same size as our original image.
Next, we create a white circle on our mask image. The white circle corresponds exactly to the region of the moon in our original image. I tried different values to find the exact position of the moon.
From there we applied our mask to our image using the cv2.bitwise_and function.
As we saw before, the first two arguments to this function are the image itself.
The function takes an optional third argument, which is our mask. When provided, the function outputs the pixel of the original image if the corresponding pixel in the mask is non-zero, otherwise, it outputs 0.
take a look at the code below to understand better:
# if the mask has a non-zero value
# cv2.bitwise_and outputs `a`
>>> a = np.array([50], dtype="uint8")
>>> mask = np.array([1], dtype="uint8")
>>> cv2.bitwise_and(a, a, mask=mask)
array([[50]], dtype=uint8)

# if the mask has a value equal to 0
# cv2.bitwise_and outputs 0
>>> a = np.array([50], dtype="uint8")
>>> mask = np.array([0], dtype="uint8")
>>> cv2.bitwise_and(a, a, mask=mask)
array([[0]], dtype=uint8)
Finally, we display our original image, our mask, and the output image, which you can see below:
Summary
The bitwise operations are easy to apply using the built-in bitwise functions provided by OpenCV. In this tutorial, you learned how to use them with image masking to keep the region of interest.
This can be useful, for example, in object detection and face recognition.
If you're interested in learning more about computer vision and object detection, I recommend my book Mastering YOLO: Build an Automatic Number Plate Recognition System.
The code for this tutorial is available through this link.
Please feel free to leave a comment below if you have any questions or suggestions.
Previous Article
How to Remove Background with OpenCV
Next Article