Please consider supporting us by disabling your ad blocker. Thank you for your support.
Please consider supporting us by disabling your ad blocker.
How to Crop Images with OpenCV and Python

In OpenCV, images are simply Numpy arrays. So we can use Numpy array slicing for image cropping and remove the part we are not interested in.
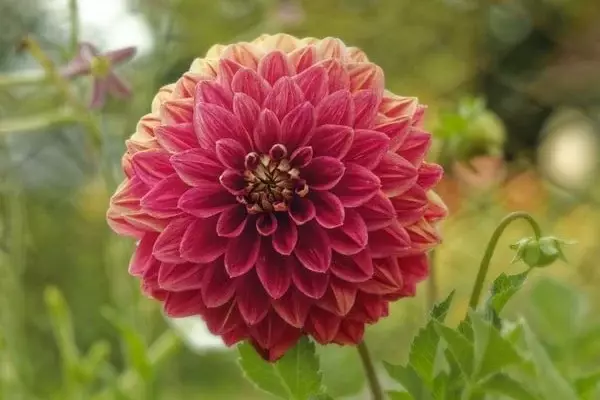
The image below will be used as an example throughout this tutorial.
This article is part 4 of the tutorial series on computer vision and image processing with OpenCV:
- How to Read, Write, and Save Images with OpenCV and Python
- How to Read and Write Videos with OpenCV and Python
- How to Resize Images with OpenCV and Python
- How to Crop Images with OpenCV and Python (this article)
- How to Rotate Images with OpenCV and Python
- How to Annotate Images with OpenCV and Python (coming soon)
- Bitwise Operations and Image Masking with OpenCV and Python
- Image Filtering and Blurring with OpenCV and Python
- Image Thresholding with OpenCV and Python
- Morphological Operations with OpenCV and Python
- Edge and Contour Detection with OpenCV and Python
Crop an Image Using OpenCV
The first dimension of a Numpy array represents the rows of the array (which is the height of the image or the y-coordinates) and the second dimension represents the columns of the array (which is the width of the image or the x-coordinates).
So to crop an image, we can use the following syntax:
cropped_img = img[y_start:y_end, x_start:x_end]Let's jump straight to an example so you don't get lost.
import cv2
# read the image
image = cv2.imread("image.jpg")
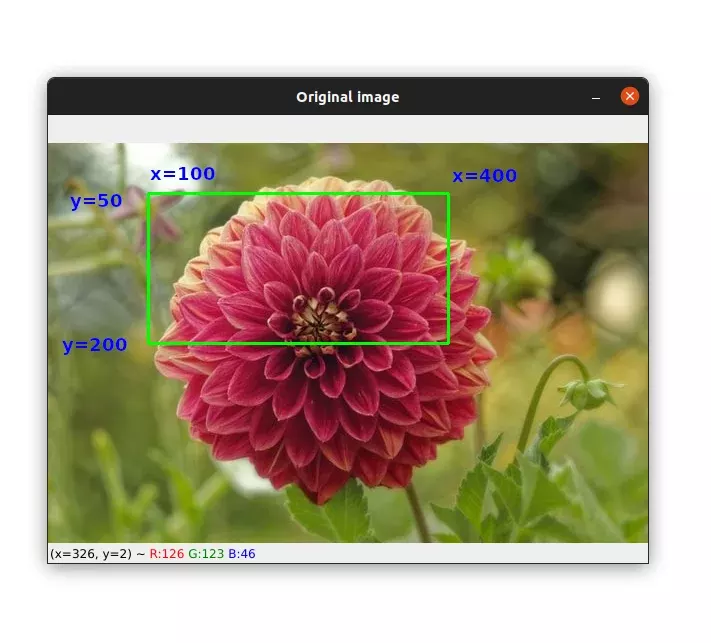
cropped_img = image[50:200, 100:400]
cv2.imshow("Original image", image)
cv2.imshow("Cropped image", cropped_img)
cv2.waitKey(0)
cv2.destroyAllWindows()When slicing a Numpy array we start with the height (the rows of the array) and then the width (the columns of the array).
Take a look at the image below to see the region we'll keep after cropping. The image also shows us the coordinates that will be used for cropping:
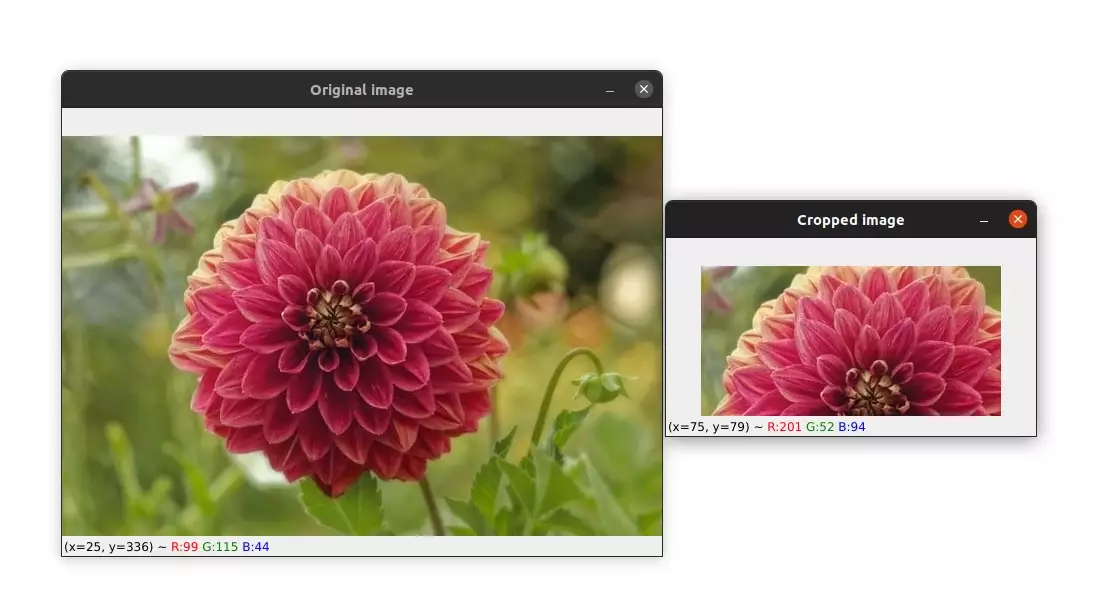
Here is the result:
Let's see another example.
image = cv2.imread("image.jpg")
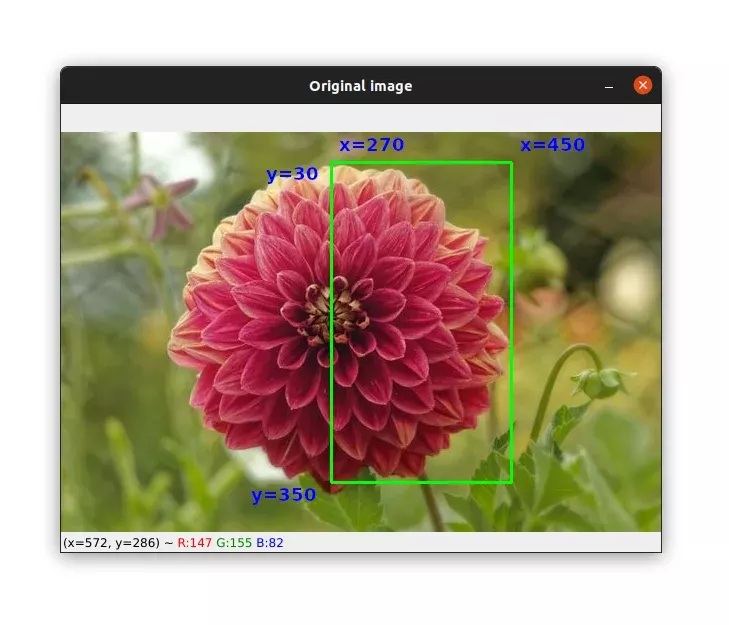
cropped_img = image[30:350, 270:450]
cv2.imshow("Original image", image)
cv2.imshow("Cropped image", cropped_img)
cv2.waitKey(0)
cv2.destroyAllWindows()Again, here are the coordinates and the region that we will keep after cropping :
and here is the cropped image:

Here is a last example of cropping which will keep only the region of the flower:
image = cv2.imread("image.jpg")
cropped_img = image[30:365, 104:450]

cv2.imshow("Original image", image)
cv2.imshow("Cropped image", cropped_img)
cv2.waitKey(0)
cv2.destroyAllWindows()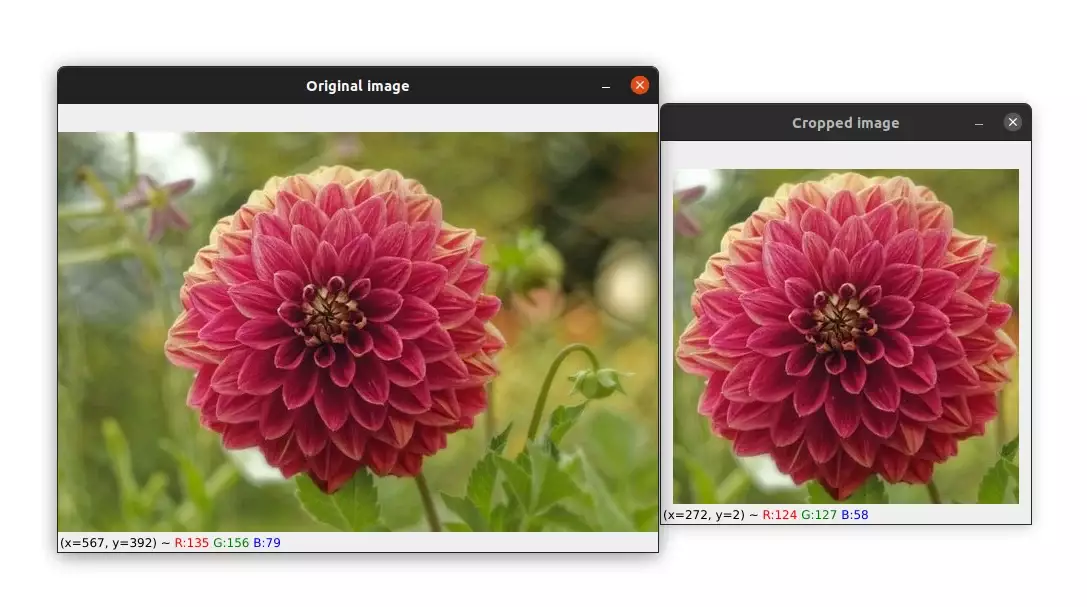
I think I've included enough examples so that you don't get lost. Hopefully, with these examples, you will get a better understanding of how cropping works.
Summary
Cropping is an important image processing operation and is also very simple to use. Maybe you can get confused with the starting and ending points of the slicing or you can reverse the x and y-coordinates but with some practice, this will become natural.
If you want to learn more about computer vision and image processing then check out my course Computer Vision and Image Processing with OpenCV and Python.
If you need help don't hesitate to ask in the comment section.
Previous Article

Django Celery Result Backend
Next Article

Jan. 7, 2022, 5:27 p.m.