Please consider supporting us by disabling your ad blocker. Thank you for your support.
Please consider supporting us by disabling your ad blocker.
How to Resize Images with OpenCV and Python

In this tutorial, I will show you how to resize images using OpenCV's cv2.resize() function. I will also show you how to resize an image by preserving the aspect ratio so that the resized image doesn't appear distorted.
The following image will be used as an example throughout this tutorial:
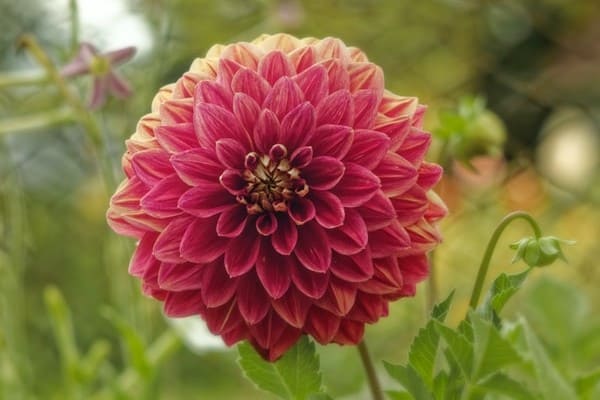
The image has a shape of (400, 600, 3)
The cv2.resize(src, dsize, dst, fx, fy, interpolation) takes 2 required arguments and 4 optional arguments:
- src: (required) This is the input image.
- dsize: (required) The size for the output image.
- dst: (optional) The output image with size dsize.
- fx: (optional) The scale factor along the horizontal axis.
- fy: (optional) The scale factor along the vertical axis.
- interpolation: (optional) The algorithm used to reconstruct the new pixels. See InterpolationFlags for the list of options available.
This article is part 3 of the tutorial series on computer vision and image processing with OpenCV:
- How to Read, Write, and Save Images with OpenCV and Python
- How to Read and Write Videos with OpenCV and Python
- How to Resize Images with OpenCV and Python (this article)
- How to Crop Images with OpenCV and Python
- How to Rotate Images with OpenCV and Python
- How to Annotate Images with OpenCV and Python (coming soon)
- Bitwise Operations and Image Masking with OpenCV and Python
- Image Filtering and Blurring with OpenCV and Python
- Image Thresholding with OpenCV and Python
- Morphological Operations with OpenCV and Python
- Edge and Contour Detection with OpenCV and Python
Resizing with a Specific Width and Height (Don't Preserve Aspect Ratio)
We can downscale or upscale an image when resizing it. Let's downscale the original image to 300x300 pixels:
import cv2

# read the image
image = cv2.imread("image.jpg")
print("Original shape: ", image.shape)

height = 300
width = 300
dimensions = (width, height)
new_image = cv2.resize(image, dimensions, interpolation=cv2.INTER_LINEAR)

print("New shape:      ", new_image.shape)

# display the images
cv2.imshow("Original image", image)
cv2.imshow("Resized image", new_image)
cv2.waitKey(0)
cv2.destroyAllWindows()
output:
Original shape:  (400, 600, 3)
New shape:       (300, 300, 3)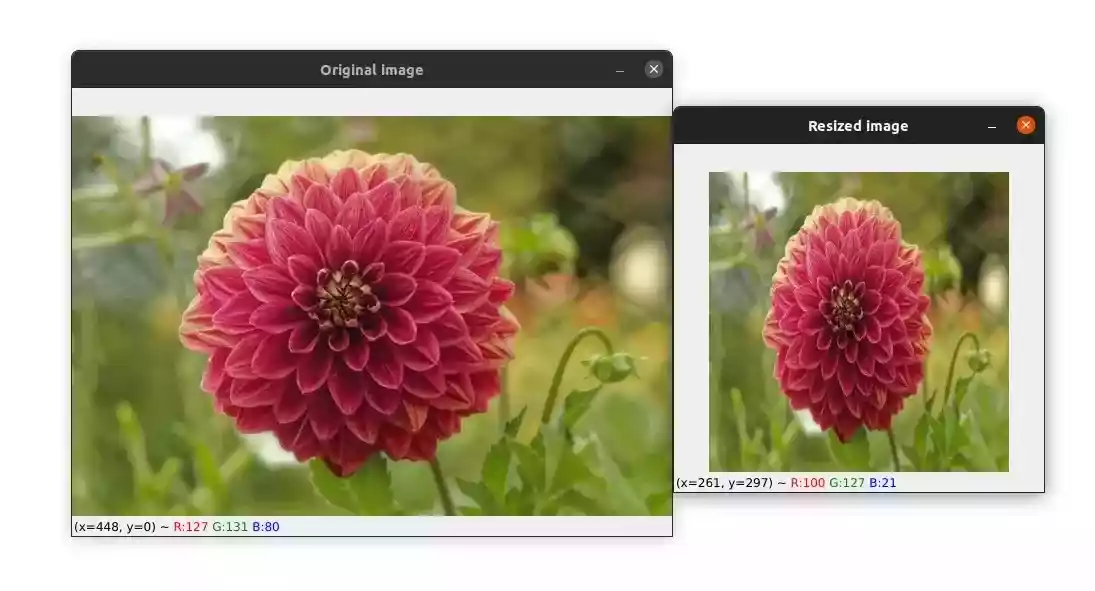
As you can see, the new image is a bit distorted because we didn't take into account the aspect ratio.

Resizing with a Scaling Factor (Preserve Aspect Ratio)
We can resize an image by using a scaling factor. Basically, a scaling factor is a number by which you multiply the dimension of the image. For example, if you want your new image to be half of the original image, then the scaling factor should be 0.5.
This way, you are sure that the aspect ratio of the original image will be the same as that of the new image.
import cv2
# read the image
image = cv2.imread("image.jpg")
print("Original shape: ", image.shape)
height = image.shape[0]
width = image.shape[1]
# We want the new image to be 60% of the original image
scale_factor = 0.6
new_height = int(height * scale_factor)
new_width = int(width * scale_factor)
dimensions = (new_width, new_height)
new_image = cv2.resize(image, dimensions, interpolation=cv2.INTER_LINEAR)
print("New shape: ", new_image.shape)
cv2.imshow("Original image", image)
cv2.imshow("Resized image", new_image)
cv2.waitKey(0)
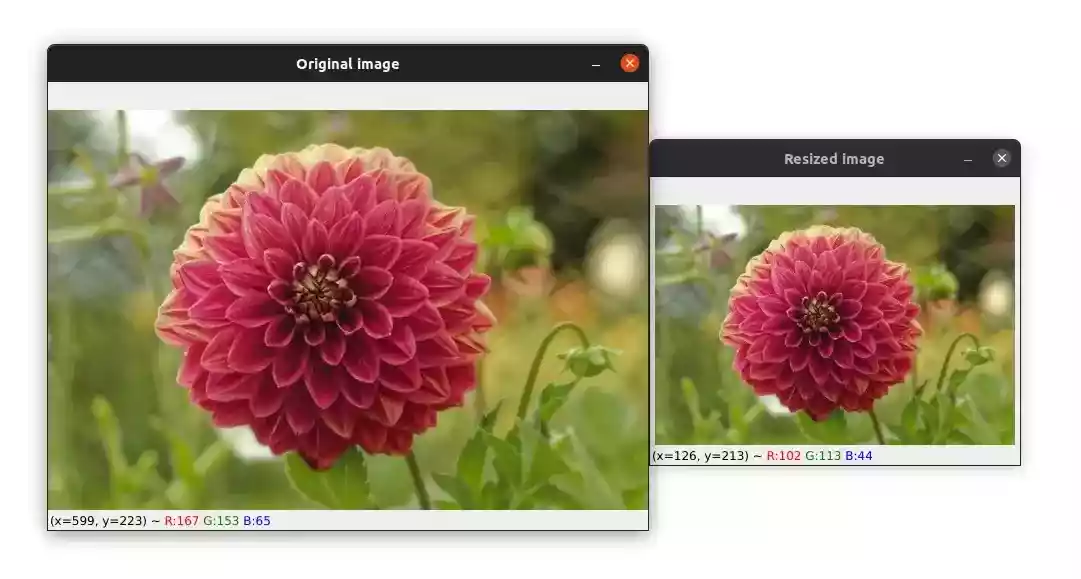
cv2.destroyAllWindows()Original shape: (400, 600, 3)
New shape: (240, 360, 3)Here, we wanted our new image to be 60% of the original one, so we multiplied the width and height by 0.6.
Resizing with a Specific Width or Height (Preserve Aspect Ratio)
Usually, you don't want to set a scale factor, instead, you want to resize the image to a specific width or height, and you want the aspect ratio to be automatically maintained.
So in order to do that, we need to calculate the aspect ratio of the original image and use it to resize the image.
Here is how to do it:
import cv2
# read the image
image = cv2.imread("image.jpg")
print("Original shape: ", image.shape)
height = image.shape[0]
width = image.shape[1]
# let's say we want the new width to be 400px
# and compute the new height based on the aspect ratio
new_width = 400
ratio = new_width / width # (or new_height / height)
new_height = int(height * ratio)
dimensions = (new_width, new_height)
new_image = cv2.resize(image, dimensions, interpolation=cv2.INTER_LINEAR)
print("New shape: ", new_image.shape)
cv2.imshow("Original image", image)
cv2.imshow("Resized image", new_image)
cv2.waitKey(0)
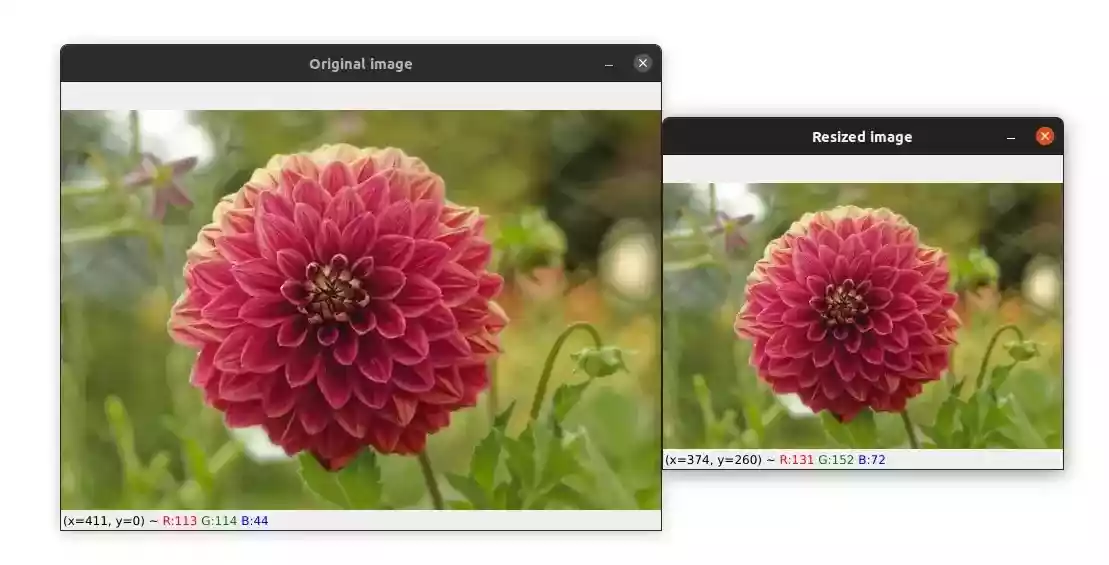
cv2.destroyAllWindows()Original shape: (400, 600, 3)
New shape: (266, 400, 3)Let's say we want our new image to have a width of 400px. We use this new width to calculate the ratio and we calculate the new height by multiplying the original height by the ratio.
The ratio is equal to: ratio = new_width/width = new_height/height. If we want to resize using a new width, we calculate the ratio using new_width/width and if we want to resize using a new height, we calculate the ratio using new_height/height.
The new image will not appear distorted. Here is the result:
Related article: How to Crop Images with OpenCV and Python
Summary
In this tutorial, you learned how to resize an image using a custom width and height but the resulting image looked distorted. You also learned how to use a scaling factor to preserve the aspect ratio while resizing; the resulting image didn't look distorted.
Finally, I showed you how to resize an image by preserving the aspect ratio without using a scaling factor. This is useful when you want to resize your image by providing a specific width or height.
If you want to learn more about computer vision and image processing then check out my course Computer Vision and Image Processing with OpenCV and Python.
Please feel free to leave a comment in the section below.
Previous Article

How to Read and Write Videos with OpenCV and Python
Next Article