Please consider supporting us by disabling your ad blocker. Thank you for your support.
Please consider supporting us by disabling your ad blocker.
Template Matching for Object Detection with OpenCV and Python
Get the Source code for this article
In this tutorial, we will learn how to use OpenCV to perform template matching. Template matching is a simple form of object detection that is computationally inexpensive. It involves finding areas of an image that are similar to a patch (template).
With simplicity comes a price. Template matching can fail to detect objects if there are changes in the lighting, rotation, scale, etc. For this reason, it is best suited for scenarios where the object of interest is static, well-defined, and the lighting is consistent.
For example, template matching can be used to detect stop signs, logos, symbols, etc.
What is Template Matching?
Template matching is a computer vision technique that involves searching for a template image within a larger image.
The goal is to identify areas of the larger image that match or closely resemble the template image. In other words, the technique is designed to find the location of a particular object within an image.
At its core, template matching involves sliding the template image over the larger image, comparing the pixels of the two images, and finding the location of the template image that produces the best match.
There are different methods for performing this comparison, such as correlation, difference, etc. Refer to the OpenCV documentation for the full list of methods.
Template Matching with OpenCV
OpenCV comes with the function cv2.matchTemplate() for performing template matching.
The function takes the following arguments:
- image – The larger image where you want to search for the template.
- template – The template image that you are searching for.
- method – The comparison method to use. There are several comparison methods available (see TemplateMatchModes).
The function then returns a matrix that contains the comparison results. Each element in the matrix will have a value that indicates how well the template image matches the region of the larger image.
Let's see how this works in practice. Create a new Python script, name it template_matching.py, and copy the following code into it:
# import the necessary packages
import cv2


# load the main image and the template image
image = cv2.imread("examples/1.jpg")
template = cv2.imread("examples/template1.jpg")
# make a copy of the image
image_copy = image.copy()

# convert the images to grayscale
image_gray = cv2.cvtColor(image, cv2.COLOR_BGR2GRAY)
template_gray = cv2.cvtColor(template, cv2.COLOR_BGR2GRAY)

# get the width and height of the template image
template_h, template_w = template.shape[:-1]

# perform template matching using the normalized cross-correlation method
result = cv2.matchTemplate(image_gray, template_gray, cv2.TM_CCOEFF_NORMED)
The first step is to load the main image and the template image. We then make a copy of the main image, convert the two images to greyscale, and get the width and height of the template image.
Then, we perform template matching using the normalized cross-correlation method.
The result of the template matching is a matrix that contains the comparison results. This matrix has the following dimensions:
-
width = imageheight - templateheight + 1
-
height = imagewidth - templatewidth + 1
So the next step is to find the location of the best match.
This can be done by using the cv2.minMaxLoc() function. This function returns the location of the minimum and maximum values in the matrix, along with the minimum and maximum values themselves.
# find the location of the best match in the result map
min_val, max_val, min_loc, max_loc = cv2.minMaxLoc(result)

# draw a rectangle around the best match
top_left = max_loc
bottom_right = (top_left[0] + template_w, top_left[1] + template_h)
cv2.rectangle(image_copy, top_left, bottom_right, (0, 255, 0), 2)

# show the images
cv2.imshow("Image", image)
cv2.imshow("Template", template)
cv2.imshow("Matched Template", image_copy)
cv2.waitKey(0)
So here we are using the cv2.minMaxLoc() function to find the location of the maximum value in the result matrix.
Next, we extract the top-left and bottom-right coordinates of the rectangle that will be drawn around the best match.
Finally, we draw the rectangle on the copy of the main image and display the images.
Let's test our code and see how it works. Here is our example image:

And here is the template image:

So our goal is to detect this cute cat in the main image.
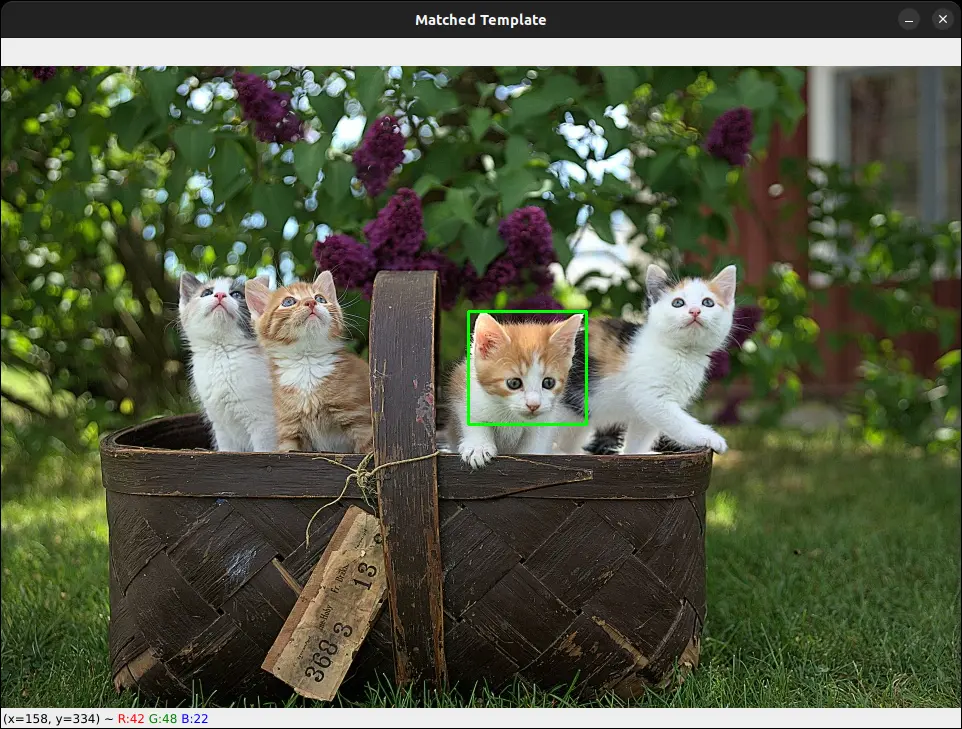
As you can see, the template matching technique was able to detect the cat in the main image.
Multi-Template Matching with OpenCV
What if we want to detect multiple instances of the same object in an image? In this case, we need to make some modifications to our code.
In our previous code, we are only getting the location of the best match. we can modify our code such that it will get the location of all the matches that are above a certain threshold.
Let's see how to do it. Create a new Python script, name it multi_template_matching.py, and copy the following code into it:
import cv2
import numpy as np


# set the template matching and
# non-maximum suppression thresholds
thresh = 0.98
nms_thresh = 0.6

# load the main image and the template image
image = cv2.imread("examples/2.jpg")
template = cv2.imread("examples/template2.jpg")
# make a copy of the image
image_copy = image.copy()

# convert the images to grayscale
image_gray = cv2.cvtColor(image, cv2.COLOR_BGR2GRAY)
template_gray = cv2.cvtColor(template, cv2.COLOR_BGR2GRAY)

# get the width and height of the template image
template_h, template_w = template.shape[:-1]

# perform template matching using the normalized cross-correlation method
result = cv2.matchTemplate(image_gray, template_gray, cv2.TM_CCOEFF_NORMED)
The code snippet above is almost the same as the one we used in the previous section. This time, we are importing the Numpy library and setting the template matching and non-maximum suppression thresholds.
We will use Numpy to get the locations of all the matches that are above the threshold.
Here we set the non-maximum suppression threshold because we want to avoid detecting the same object multiple times.
Let's now filter out the locations of the matches that are above the threshold:
# get the coordinates of the matches that are above the threshold
y_coords, x_coords = np.where(result >= thresh)

print("Number of matches found:", len(x_coords))

# loop over the coordinates and draw a rectangle around the matches
for x, y in zip(x_coords, y_coords):
    cv2.rectangle(image_copy, (x, y), (x + template_w,
                  y + template_h), (0, 255, 0), 2)

# show the images
cv2.imshow("Template", template)
cv2.imshow("Multi-Template Matching", image_copy)
cv2.waitKey(0)
Using the np.where() function, we get the (x, y) coordinates of the matches that are greater than our threshold.
Then, we loop over the coordinates and draw the bounding boxes on the copy of the main image. Finally, we display the images.
Here are the image and the template image that we will use for multi-template matching:
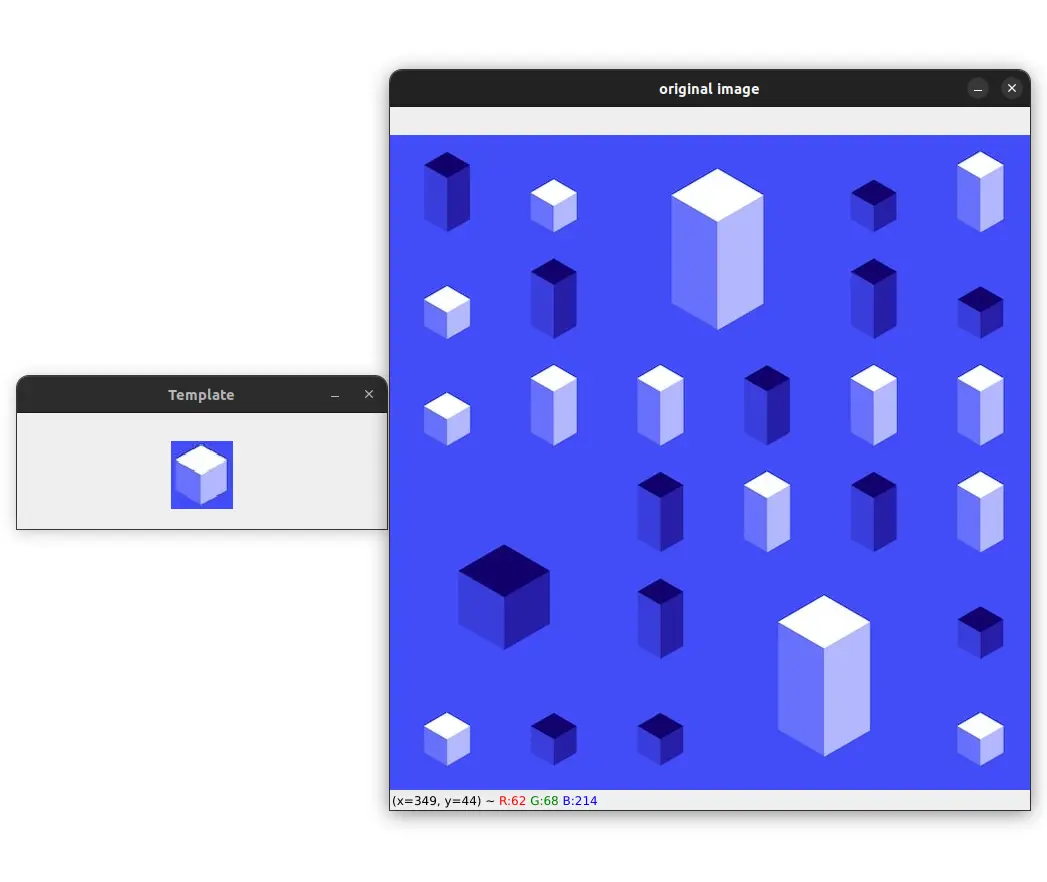
So here our goal is to detect all the small white cubes in the image. Let's run our code and see if this works:
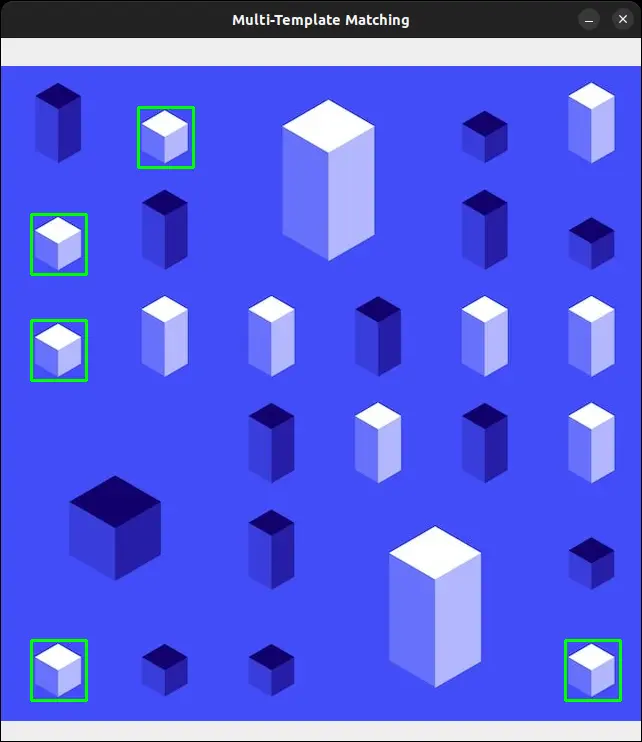
As you can see, our code was able to detect all the small white cubes in the image. And if you check your terminal, you will see that the number of matches found is 5.
Let's try another example. Here are the image and the template image:
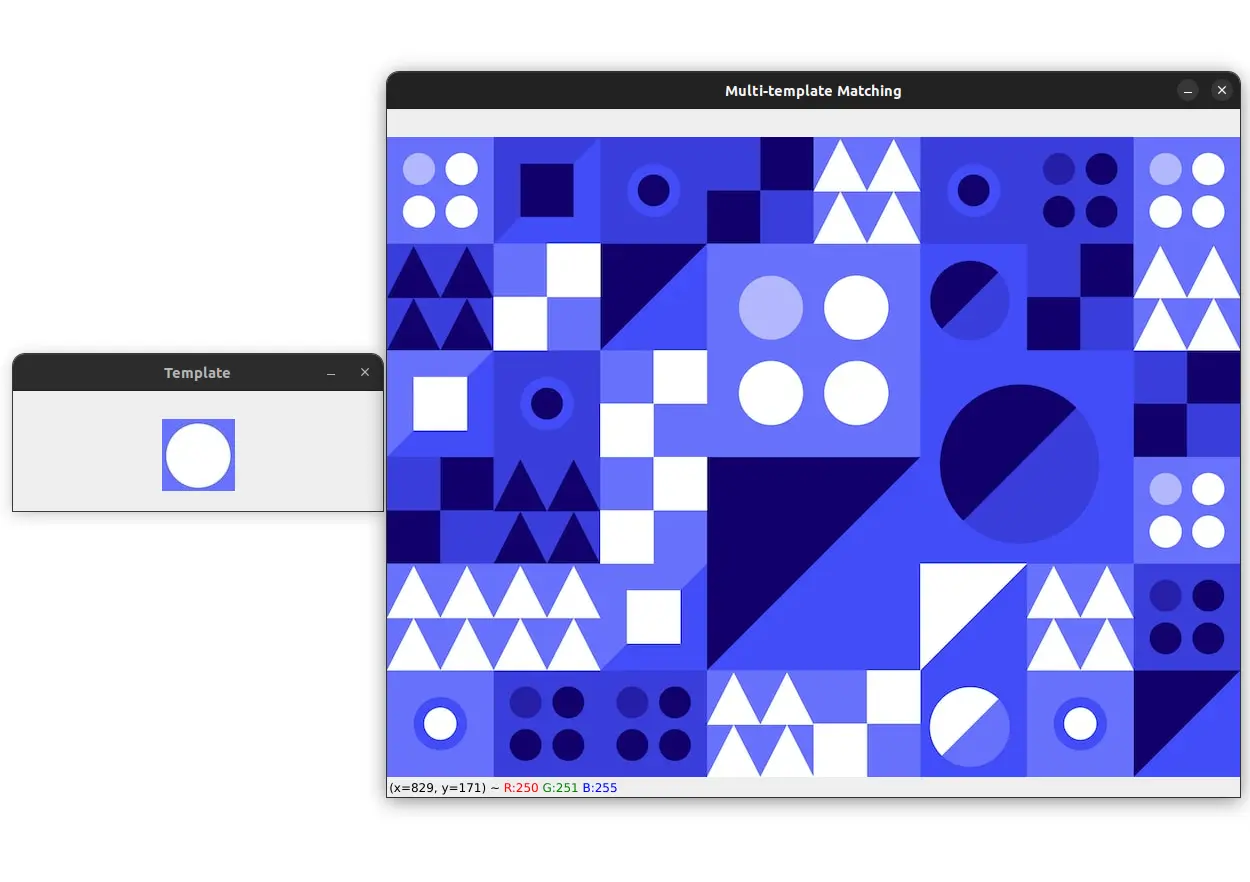
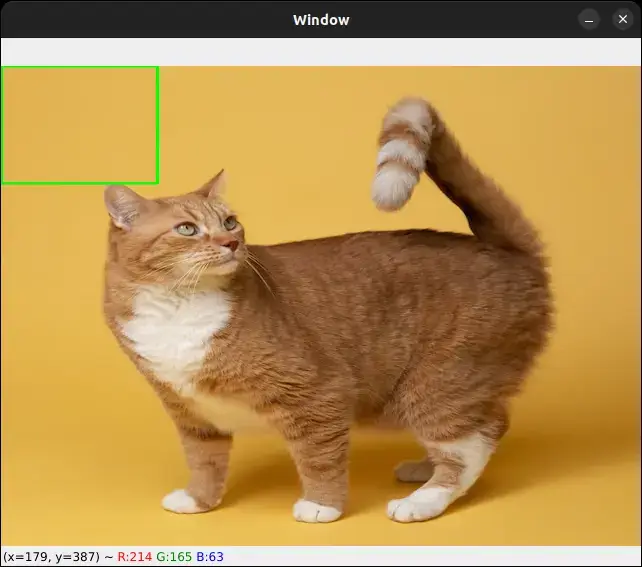
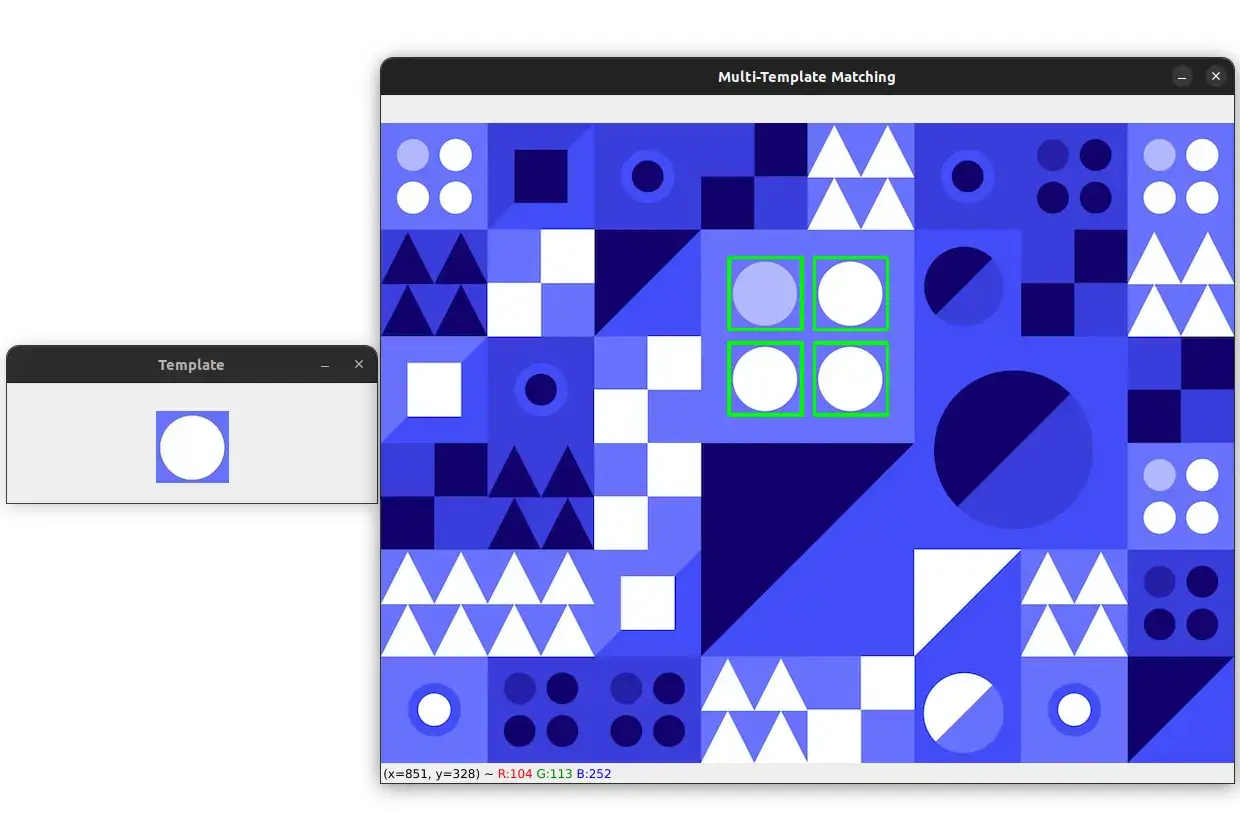
Our goal is to detect all white circles in the image.
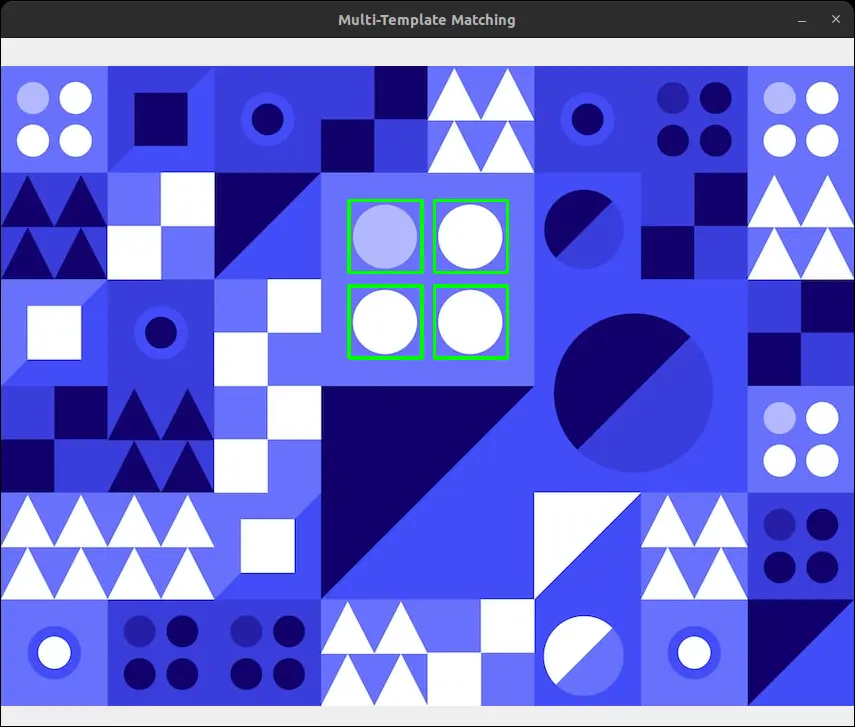
As you might have noticed, the small white circles aren't detected. This is because template matching fails to detect objects at different scales.
Also, if you check your terminal, you will see that the number of matches found is 8. This is because the same object is detected multiple times. Meaning that different locations refer to the same object.
To avoid this, we can apply non-maximum suppression.
I will not go into the details of NMS here because it is out of the scope of this tutorial.
Simply put, non-maximum suppression (NMS) is a technique used in computer vision to eliminate redundant or overlapping bounding boxes that are detected by an object detection algorithm.
Non-Maximum Suppression for Multi-Template Matching
OpenCV provides a function called cv2.dnn.NMSBoxes() that can be used to perform non-maximum suppression.
Let's see how to use it.
# create a list of bounding boxes
boxes = np.array([[x, y, x + template_w, y + template_h]
                 for (x, y) in zip(x_coords, y_coords)])

# apply non-maximum suppression to the bounding boxes
indices = cv2.dnn.NMSBoxes(
    boxes, result[y_coords, x_coords], thresh, nms_thresh)

print("Number of matches found after NMS:", len(indices))
First, we create a list of bounding boxes using the coordinates of the matches that are greater than the threshold.
After getting our list of bounding boxes, we apply non-maximum suppression to them using the cv2.dnn.NMSBoxes() function.
The function takes the bounding boxes, the scores, the threshold, and the non-maximum suppression threshold as arguments.
The scores are the values that are returned by the template matching function result. We just need to get the scores of the matches that are above the threshold. In the above code, we are doing this by using the result[y_coords, x_coords] expression.
The thresh argument is not very important here because we have already filtered out the matches that are below the threshold.
The nms_thresh argument is the non-maximum suppression threshold. We have already set this threshold to 0.6.
The function returns the indices of the bounding boxes that survived the non-maximum suppression. So for example, in our previous example, we have 8 bounding boxes which are:
[[347 134 420 206]
 [348 134 421 206]
 [433 134 506 206]
 [347 219 420 291]
 [348 219 421 291]
 [433 219 506 291]
 [348 220 421 292]
 [433 220 506 292]]
After applying non-maximum suppression, we will get this list of indices:
[2 5 1 4]
So the indices 2, 5, 1, and 4 refer to the bounding boxes that survived the non-maximum suppression. We can use these indices to keep only the bounding boxes that survived the non-maximum suppression.
for i in indices:
    (x, y, w, h) = boxes[i][0], boxes[i][1], boxes[i][2], boxes[i][3]
    cv2.rectangle(image, (x, y), (w, h), (0, 255, 0), 2)

cv2.imshow("Multi-Template Matching After NMS", image)
cv2.waitKey(0)
Here we loop over the indices and draw the bounding boxes on the main image.
The result would like quite similar to the previous one:
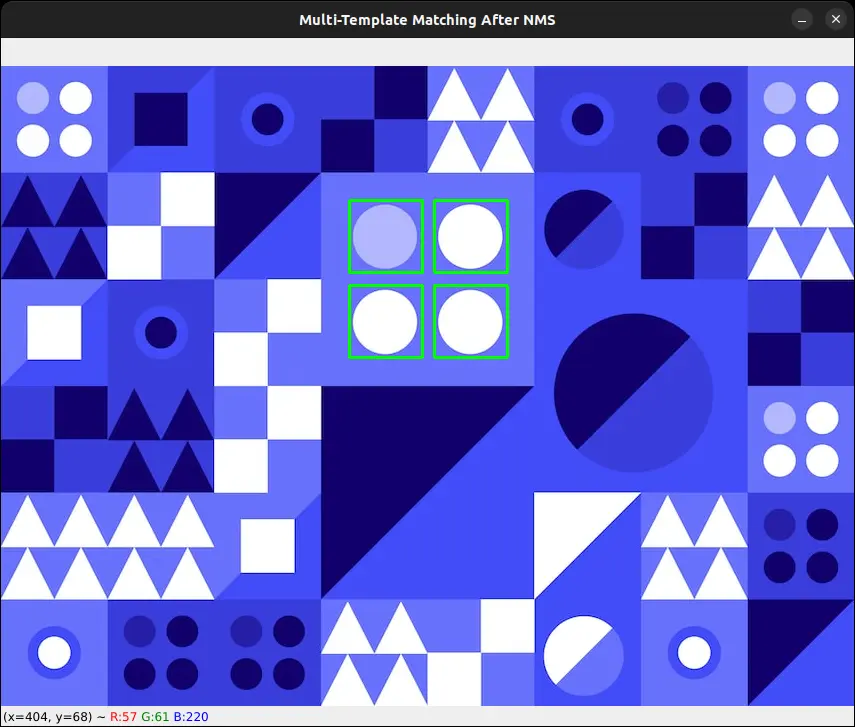
But if you see closely, you will notice that the thickness of the bounding boxes is different. This is because we have removed duplicate bounding boxes using non-maximum suppression.
and if you check your terminal, you will see that the number of matches found after NMS is 4.
And that's it. We have successfully detected all the white circles in the image using template matching and removed the duplicate bounding boxes using non-maximum suppression.

Summary
Congratulations! You have successfully learned how to use template matching with OpenCV and Python.
By now, you should be familiar with the concept of template matching and how it can be used for simple object detection.
I also showed you how to perform multi-template matching and non-maximum suppression, which is useful when you want to detect multiple instances of the same template in an image.
I hope you found this tutorial helpful in understanding how to use template matching for object detection, and how to implement it using OpenCV.
As always, the code for this tutorial is available here.
If you have any questions, feel free to ask them in the comments section below.