Please consider supporting us by disabling your ad blocker. Thank you for your support.
Please consider supporting us by disabling your ad blocker.
Object Detection with Python, Deep Learning, and OpenCV
In this tutorial, we will see how to detect objects using deep learning and OpenCV.
Object detection is the process of locating objects with bounding boxes in an image or a video. It is one of the most important tasks in computer vision, and it has many applications in various fields such as surveillance, people counting, traffic monitoring, detecting pedestrians, self-driving cars, etc.
Object detection is different from image classification: Object detection is the process that identifies or locates objects in an image while image classification is the process that assigns labels (classes) to images based on their content.
When using deep learning-based object detection, the following algorithms are the most important:
- Faster RCNN (2015)
- You Only Look Once (YOLO) (2016)
- Single Shot Detector (SSD) (2016)
In our case, we will be using the Single Shot Detector framework combined with the MobileNet architecture as our deep learning-based object detector.
MobileNet is a lightweight and fast object detector model that was developed by Google. It was trained on the ImageNet dataset and can run on real-time and resource-constrained devices such as smartphones and other embedded systems.
If you're interested in learning how to use YOLO instead of Single Shot Detector, then you'll definitely want to check out my new ebook, Mastering YOLO: Build an Automatic Number Plate Recognition System.
This comprehensive guide will take you step-by-step through everything you need to know to master YOLO, from data collection to deployment. With practical examples, hands-on coding experience, and real-world implementation, this book will take your skills to the next level.
Object Detection in Images
First, we will see how to apply object detection with OpenCV and deep learning to images. Later we will modify the code so that we can detect objects on videos as well.
Open a new file, name it objet_detection_image.py, and let's write some code:
import cv2

image = cv2.imread('examples/image1.jpg')
image = cv2.resize(image, (640, 480))
h = image.shape[0]
w = image.shape[1]

# path to the weights and model files
weights = "ssd_mobilenet/frozen_inference_graph.pb"
model = "ssd_mobilenet/ssd_mobilenet_v3_large_coco_2020_01_14.pbtxt"
# load the MobileNet SSD model trained  on the COCO dataset
net = cv2.dnn.readNetFromTensorflow(weights, model)
First, we load our image from disk, resize it, and grab the height and width of the image.
Then we load our model using OpenCV's dnn module providing the references to the prototxt and model files.
The sample files are provided in the folder which contains the source code along with some images. Make sure to download these files from this link.
Next, let's load our class labels:
# load the class labels the model was trained on
class_names = []
with open("ssd_mobilenet/coco_names.txt", "r") as f:
    class_names = f.read().strip().split("\n")
We first create the list class_names that will contain the names of the classes from the file.
Then we open our file using context manager and store each line, which corresponds to each class name, in our list.
Let's now apply object detection:
# create a blob from the image
blob = cv2.dnn.blobFromImage(
    image, 1.0/127.5, (320, 320), [127.5, 127.5, 127.5])
# pass the blog through our network and get the output predictions
net.setInput(blob)
output = net.forward() # shape: (1, 1, 100, 7)
We create a blob using the cv2.dnn.blobFromImage function. Basically, this function is used to preprocess our image and prepare it for the network. It applies a mean subtraction and a scaling to the input image.
The first argument to this function is the input image. The second one is the scale factor which we can use to scale our image.
The third argument is the spatial size of the output image and the last argument is the mean subtraction values which are subtracted from channels.
The values for these parameters are provided in the documentation, don't worry too much about them.
Next, we set the blob as input for the network and detect the objects on the image using our Single Shot Detector.
The result is stored in the output variable. If you print out the shape of this variable, you'll get a shape of (1, 1, 100, 7).
So we can loop over the detections to filter the results and get the bounding boxes of the detected objects:
# loop over the number of detected objects
for detection in output[0, 0, :, :]: # output[0, 0, :, :] has a shape of: (100, 7)
    # the confidence of the model regarding the detected object
    probability = detection[2]

    # if the confidence of the model is lower than 50%,
    # we do nothing (continue looping)
    if probability < 0.5:
        continue

    # perform element-wise multiplication to get
    # the (x, y) coordinates of the bounding box
    box = [int(a * b) for a, b in zip(detection[3:7], [w, h, w, h])]
    box = tuple(box)
    # draw the bounding box of the object
    cv2.rectangle(image, box[:2], box[2:], (0, 255, 0), thickness=2)

    # extract the ID of the detected object to get its name
    class_id = int(detection[1])
    # draw the name of the predicted object along with the probability
    label = f"{class_names[class_id - 1].upper()} {probability * 100:.2f}%"
    cv2.putText(image, label, (box[0], box[1] + 15),
                cv2.FONT_HERSHEY_SIMPLEX, 0.5, (0, 255, 0), 2)

cv2.imshow('Image', image)
cv2.waitKey()
We loop over the number of detected objects, get the confidence of the model and check whether it is lower than 50%. If this is the case, we do nothing and continue looping over the detections.
If the confidence (or the probability) of the model is greater than 50%, we proceed to draw the bounding box of the detected object.
The (x, y) coordinates of the bounding box are defined relatively with regard to the width and height of the image, so we need to multiply them by the width and height of the image to get the actual (x, y) coordinates of the bounding box. This is what we did in the list compression before drawing the bounding box.
Next, we extract the class ID of the detected object, get the class label, and draw the text inside the bounding box.
We are ready to try our deep-learning object detector. Open a new terminal and run the following command:
$ python object_detection_image.py 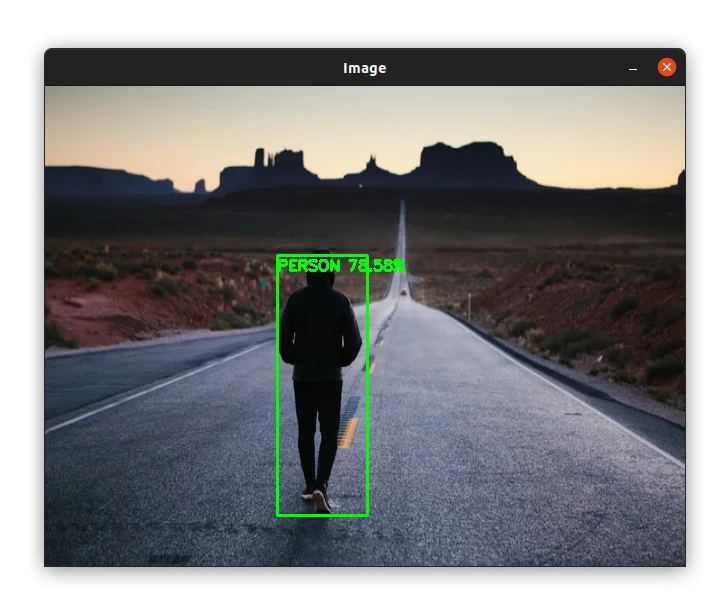
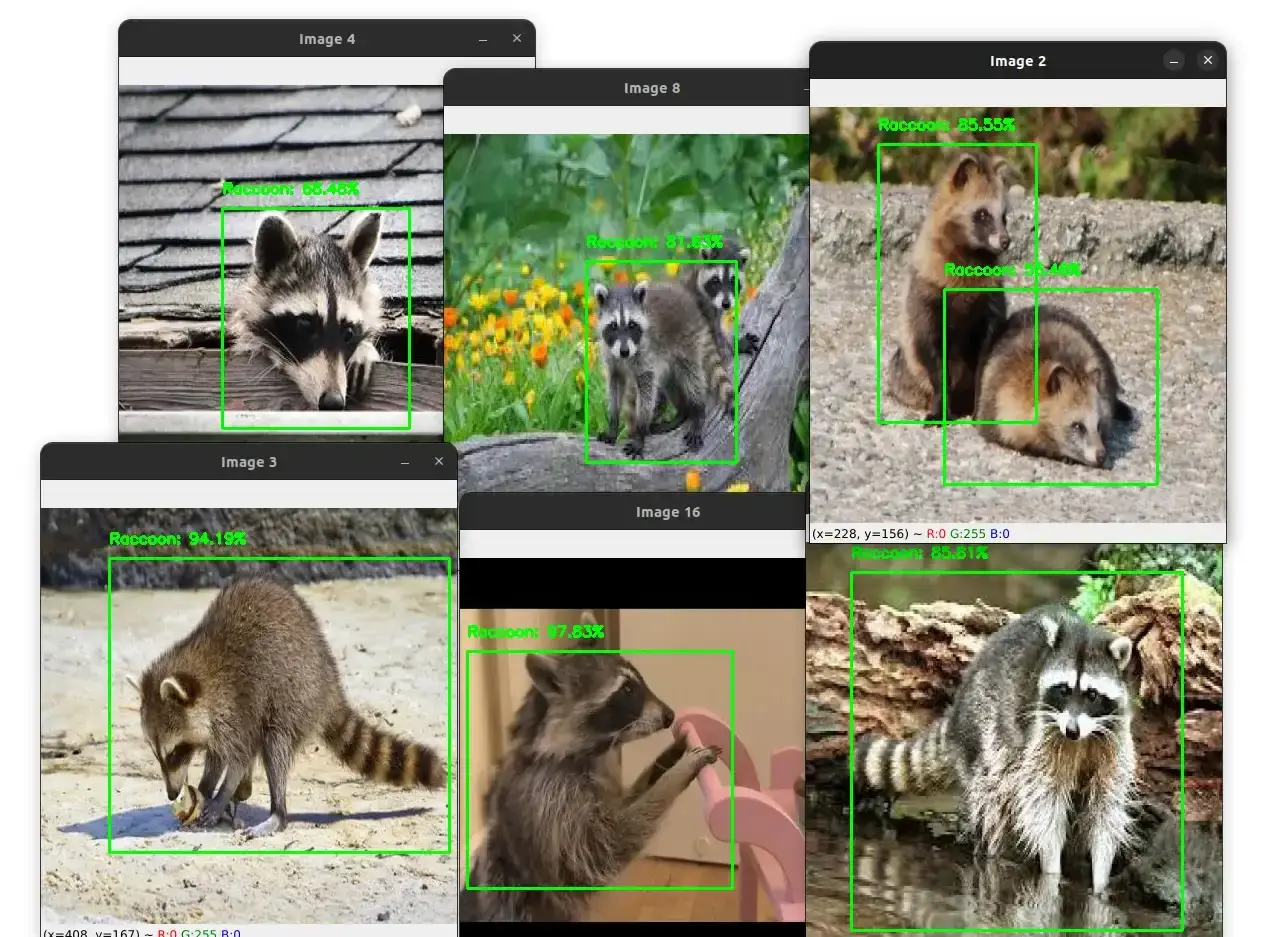
In the image above, you can see that the algorithm detected the person in the image yet the person is returned. Not bad!
Let's try another image:
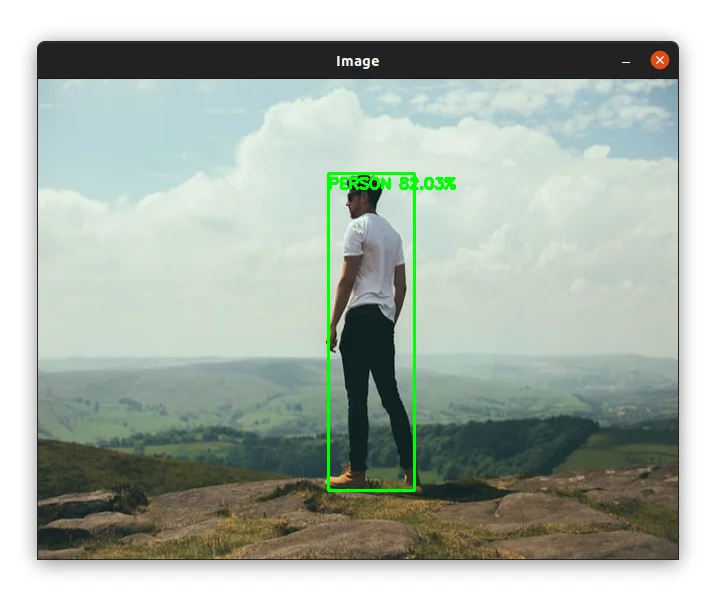
The person was detected with 82% confidence. Cool!
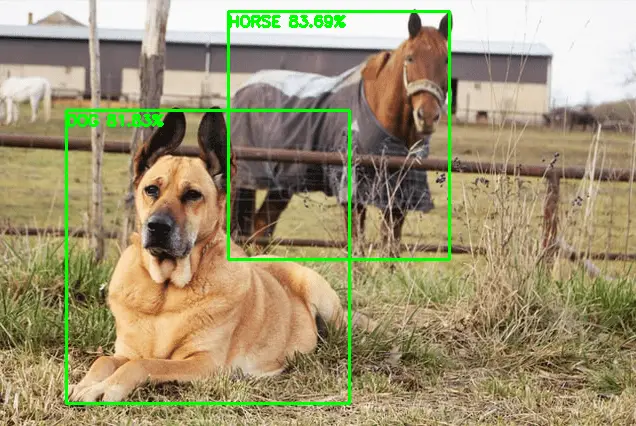
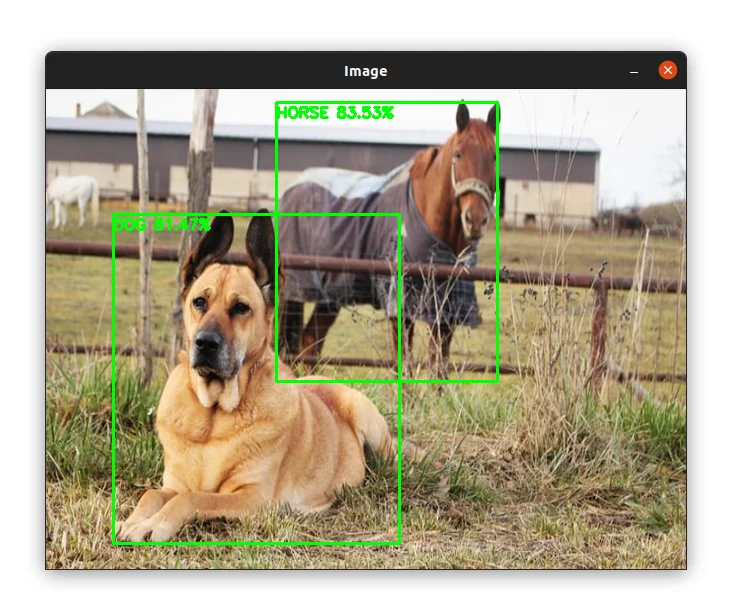
In the image below, the horse and the dog are detected successfully. The horse was detected yet it is not clearly visible:

Object Detection in Videos
Now that you know how to detect objects in images, let's see how to apply our deep-learning object detector to videos.
Open a new file, name it objet_detection_video.py, and let's write some code:
import numpy as np
import cv2
import datetime

video_cap = cv2.VideoCapture("examples/video1.mp4")

# grab the width and the height of the video stream
frame_width = int(video_cap.get(cv2.CAP_PROP_FRAME_WIDTH))
frame_height = int(video_cap.get(cv2.CAP_PROP_FRAME_HEIGHT))
fps = int(video_cap.get(cv2.CAP_PROP_FPS))
# initialize the FourCC and a video writer object
fourcc = cv2.VideoWriter_fourcc(*"XVID")
writer = cv2.VideoWriter("output.mp4", fourcc, fps, (frame_width, frame_height))
We first import our required packages. This time we need the Numpy and datetime packages to do some additional operations.
We then initialize our video stream and video writer.
Let's now load our model and define the list of class labels and their corresponding colors:
# path to the weights and model files
weights = "ssd_mobilenet/frozen_inference_graph.pb"
model = "ssd_mobilenet/ssd_mobilenet_v3_large_coco_2020_01_14.pbtxt"
# load the MobileNet SSD model trained  on the COCO dataset
net = cv2.dnn.readNetFromTensorflow(weights, model)

# load the class labels the model was trained on
class_names = []
with open("ssd_mobilenet/coco_names.txt", "r") as f:
    class_names = f.read().strip().split("\n")

# create a list of random colors to represent each class
np.random.seed(42)
colors = np.random.randint(0, 255, size=(len(class_names), 3))
We start by loading our MibileNet SSD network after defining the weights and model variables.
Next, we define our class labels and their corresponding colors.
Let's now process our frames to apply object detection:
# loop over the frames
while True:
    # starter time to computer the fps
    start = datetime.datetime.now()
    success, frame = video_cap.read()
    h = frame.shape[0]
    w = frame.shape[1]

    # create a blob from the frame
    blob = cv2.dnn.blobFromImage(
        frame, 1.0/127.5, (320, 320), [127.5, 127.5, 127.5])
    # pass the blog through our network and get the output predictions
    net.setInput(blob)
    output = net.forward() # shape: (1, 1, 100, 7)
First, we start a timer which we will use to compute the FPS.
Next, we do the same as we did with images. We read the next frame from the video, get its height and width, create a blob, and then pass the blob to the network to obtain the detections.
Now, we can loop over the detections, filter the results to only keep detections with high probability, and get the bounding boxes + object's name + confidence of the detected objects:
    # loop over the number of detected objects
    for detection in output[0, 0, :, :]: # output[0, 0, :, :] has a shape of: (100, 7)
        # the confidence of the model regarding the detected object
        probability = detection[2]
        # if the confidence of the model is lower than 50%,
        # we do nothing (continue looping)
        if probability < 0.5:
            continue

        # extract the ID of the detected object to get
        # its name and the color associated with it
        class_id = int(detection[1])
        label = class_names[class_id - 1].upper()
        color = colors[class_id]
        B, G, R = int(color[0]), int(color[1]), int(color[2])
        # perform element-wise multiplication to get
        # the (x, y) coordinates of the bounding box
        box = [int(a * b) for a, b in zip(detection[3:7], [w, h, w, h])]
        box = tuple(box)
        # draw the bounding box of the object
        cv2.rectangle(frame, box[:2], box[2:], (B, G, R), thickness=2)

        # draw the name of the predicted object along with the probability
        text = f"{label} {probability * 100:.2f}%"
        cv2.putText(frame, text, (box[0], box[1]),
                    cv2.FONT_HERSHEY_SIMPLEX, 0.5, (0, 255, 0), 2)
This block of code is the same as in the previous section where we perform the detection of objects in images. The only thing we added is that this time we are also getting the color associated with the detected object to use when drawing the bounding box.
Finally, let's compute the FPS, display the frame, and write it to disk:
    # end time to compute the fps
    end = datetime.datetime.now()
    # calculate the frame per second and draw it on the frame
    fps = f"FPS: {1 / (end - start).total_seconds():.2f}"
    cv2.putText(frame, fps, (50, 50),
                cv2.FONT_HERSHEY_SIMPLEX, 2, (0, 0, 255), 8)
    cv2.imshow("Output", frame)
    # write the frame to disk
    writer.write(frame)
    if cv2.waitKey(10) == ord("q"):
        break

# release the video capture, video writer, and close all windows
video_cap.release()
writer.release()
cv2.destroyAllWindows()
We first end the timer and compute the FPS. The FPS is computed by dividing a single frame by the time elapsed.
Next, we draw the FPS to the screen, display the frame, and write it to disk.
Finally, we wait for the q key to break the loop and release the video capture and video writer.
Let's try out our script on a video. Open a new terminal and run the following command:
$ python object_detection_video.pyOur algorithm detected the car successfully in the video above.
Let's try another video example. In this example there are different cars:
Let's try one more video:
Summary
In this Tutorial, you learned how to detect objects in images and videos using the Single Shot Detector (SSD) framework with the MobileNet as the base model.
If you're interested in learning more about computer vision, object detection, and specifically the YOLO algorithm, I recommend my book Mastering YOLO: Build an Automatic Number Plate Recognition System.
With this comprehensive guide, you'll learn everything you need to know to master YOLO and build your own ANPR system. To learn more about the book, visit this page.
The source code for this article is available through this link.
Please feel free to leave a remark below if you have any queries or want to express your opinion.
Related Articles
Previous Article
YOLOv4 Custom Object Detection with OpenCV and Python
Next Article
