Please consider supporting us by disabling your ad blocker. Thank you for your support.
Please consider supporting us by disabling your ad blocker.
Django blog tutorial part 6: Setting Up an Email Service
In the last part, we deployed our application to the Heroku platform but we need to send emails so that our users can request a reset password. In this part, we are going to set up an email service provider in our Django application to send emails.
We are going to use SendGrid, which offers a free plan covering 40,000 emails for 30 days, then 100 emails/day free forever. Go ahead and create an account.
If you want to follow along with me, download the source code of the project from this link: https://github.com/Rouizi/django-blog/tree/v0.5
Below, I included a list of the articles in this series:
- Django blog tutorial part 1: Project Configuration
- Django blog tutorial part 2: Model View Template
- Django blog tutorial part 3: Authentication and Profile Page
- Django blog tutorial 4: Posts and Comments
- Django blog tutorial part 5: Deployment on Heroku
- Django blog tutorial part 6: Setting Up an Email Service (This post)
- Django blog tutorial part 7: Serving Media Files From Amazon S3
Setting Up SendGrid
To be able to send emails, SendGrid requires its customers to create a Sender Identity. There are two ways to create a sender identity: Single Sender Verification or Domain Authentication.
Here we are going to use single sender verification as it is the easiest method, but it is recommended only for testing.
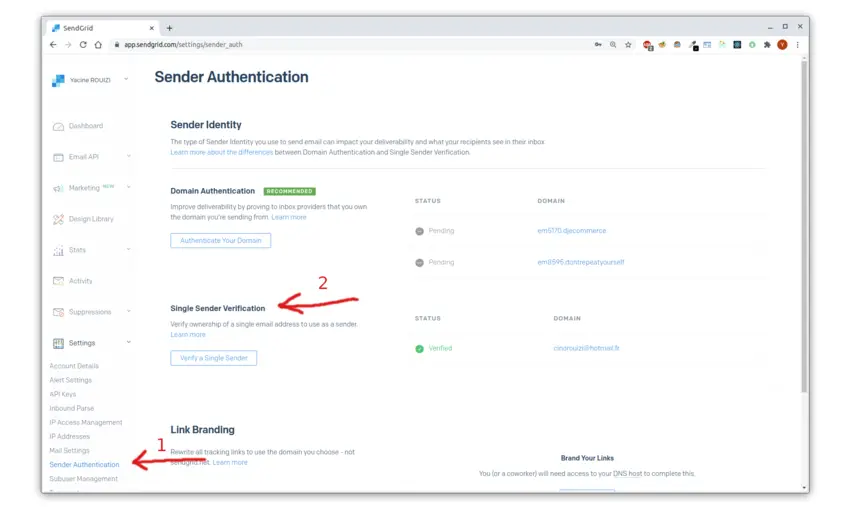
1. Under Settings, click Sender Authentication.
2. Select Get started under Single Sender Authentication (my email address is already verified)
On the next page, click Create New Sender
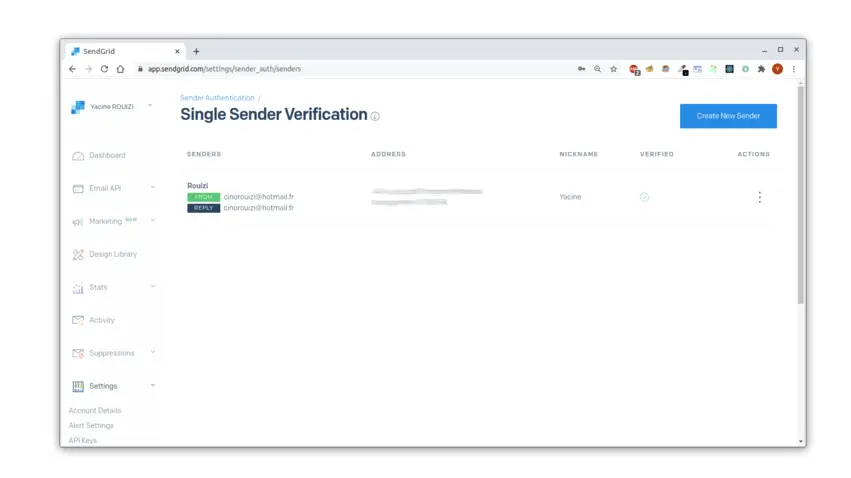
Fill in the modal form that appears and click Create. A confirmation email will be sent to the email address that you entered, click the link in the email to verify the Sender address.
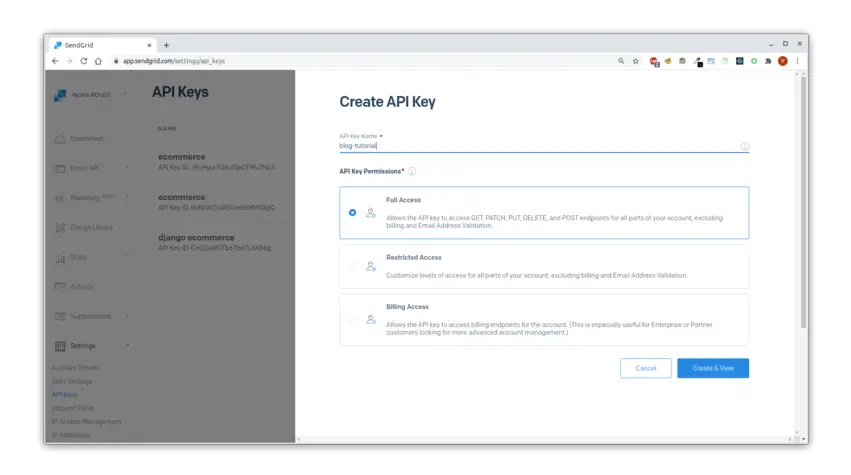
Now you need to create an API key. For that, under settings click API Keys. On the next page, click Create API Key.
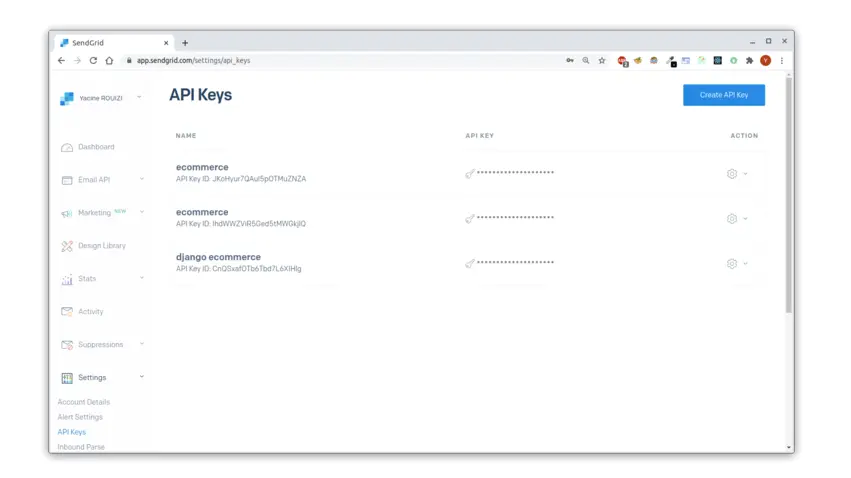
Give a name to your API Key, permission, and click Create & View.
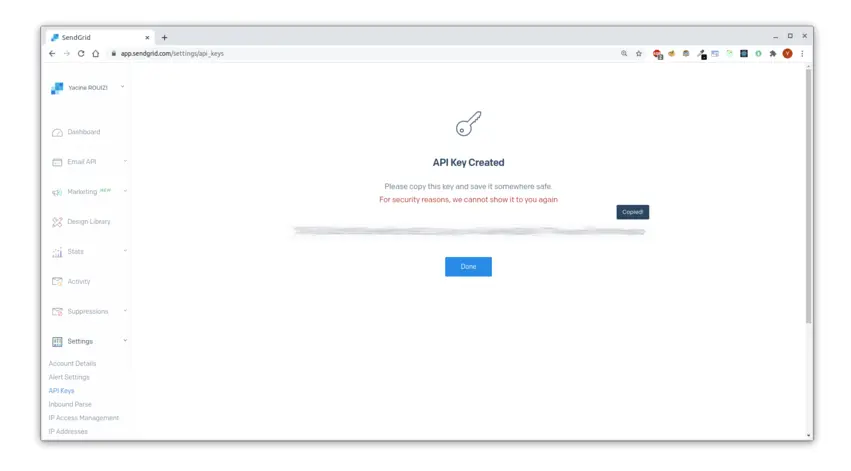
After that, you will see your API key on a new page, copy it, and save it somewhere.
Configuring Django
Now we need to configure the application to send emails:
# blog/settings.py
# ...

EMAIL_BACKEND = "django.core.mail.backends.console.EmailBackend"  # remove this line

# ...
if os.environ.get("ENV") == "PRODUCTION":
    # ...
    EMAIL_HOST = os.environ.get("EMAIL_HOST")
    EMAIL_PORT = os.environ.get("EMAIL_HOST")
    EMAIL_HOST_USER = os.environ.get("EMAIL_HOST")
    EMAIL_HOST_PASSWORD = os.environ.get("EMAIL_HOST")
    EMAIL_USE_TLS = True
    DEFAULT_FROM_EMAIL = "Django blog <noreply@djangoblog.com>"
else:
    EMAIL_BACKEND = "django.core.mail.backends.console.EmailBackend"
Then add the environment variables:
heroku config:set EMAIL_HOST="smtp.sendgrid.net"
heroku config:set EMAIL_PORT=587
heroku config:set EMAIL_HOST_USER="apikey"
heroku config:set EMAIL_HOST_PASSWORD="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"
Finally, we need to specify the from_email parameter in the PasswordResetView class (put the email address that you verified earlier):
# users/urls.py
# ...
urlpatterns = [
    # ...
    path('password_reset/', PasswordResetView.as_view(
        template_name='users/password_reset.html',
        email_template_name='users/password_reset_email.html',
        subject_template_name='users/password_reset_subject.txt',
        success_url='/users/password_reset/done/',
        from_email="cinorouizi@hotmail.fr"), # Add this line
        name='password_reset'
    ),
    # ...
]
And that's it!
Push the code to Heroku and try to reset your password. You should receive an email with a link that redirects you to the site.
You can find the source code of the project, including this chapter, at this link: https://github.com/Rouizi/django-blog/tree/v0.6
Previous Article

Django blog tutorial part 5: Deployment on Heroku
Next Article
