Please consider supporting us by disabling your ad blocker. Thank you for your support.
Please consider supporting us by disabling your ad blocker.
Face Detection and Blurring with OpenCV and Python
In this tutorial, we are going to see how to detect faces with OpenCV and Haar cascade then we will use image blurring to only blur the part of the face on the image.
Face detection is a computer vision technology that consists of detecting human faces in digital images, videos, and real-time video streams.
The goal of face detection is to find all the faces within a given image and provide the relative positions and dimensions of those face regions.
There are many algorithms used for object and face detection such as Haar cascade, YOLO, R-CNN, etc.
In this tutorial, we are going to use Haar cascade.
The Haar cascade classifier is a machine learning algorithm that was developed by Paul Viola and Michael Jones in 2001 in the paper Rapid Object Detection using a Boosted Cascade of Simple Features. To train the algorithm we need to provide a lot of positive images of faces and negative images of non-faces.
We will not go into the theoretical details behind this technique, we will rather see how to use the algorithm and how to perform face detection.
Instead of training our own Haar cascade, we will be using a pre-trained one.

Face Detection and Blurring on images
Face Detection
The OpenCV library provides several pre-trained Haar cascades for face detection, eye detection, number plates detection, etc.
In our case, we are going to use a pre-trained Haar cascade that can detect faces.
Go to the official OpenCV's repository, download the haarcascade_frontalface_default.xml file, and put it in the project directory.
Now, create a new Python file and let's write some code:
import cv2

# load the input image and convert it to grayscale
image = cv2.imread("image1.jpg")
gray = cv2.cvtColor(image, cv2.COLOR_BGR2GRAY)

# load the face detector
face_detector = cv2.CascadeClassifier("haarcascade_frontalface_default.xml")
The only required package we need for now is cv2 to use OpenCV.
Then, we load the input image, convert it to grayscale, and load our Haar cascade face detector.
Next, we can start detecting faces and drawing the bounding boxes around them:
# detect the faces in the grayscale image
face_rects = face_detector.detectMultiScale(gray, 1.04, 5, minSize=(30, 30))

# go through the face bounding boxes
for (x, y, w, h) in face_rects:

    # draw a rectangle around the face on the input image
    cv2.rectangle(image, (x, y), (x + w, y + h), (0, 255, 0), 2)

cv2.imshow("Image", image)
cv2.waitKey(0)
We used the detectMultiScale function to detect faces in the grayscale image.
The first argument to this function is the image on which we want to detect faces.
The second argument is the scale factor which specifies how much the image size is reduced at each image scale. Using a value of 1.04 means we reduce the size of the image by 4% at each step.
The third argument is the number of neighbors each window should have to retain it. Increase this number if you want to get better accuracy but on the other hand, the algorithm will miss some faces.
The last parameter is the minimum size of the object. Objects smaller than this window are ignored.
The function then returns a list containing the bounding boxes of the detected faces (the (x, y) coordinates, the width, and the height of each bounding box).
So we loop over the list of bounding boxes and draw a rectangle around each detected face.
Take a look at the image below to see the result of the Haar cascade face detector:
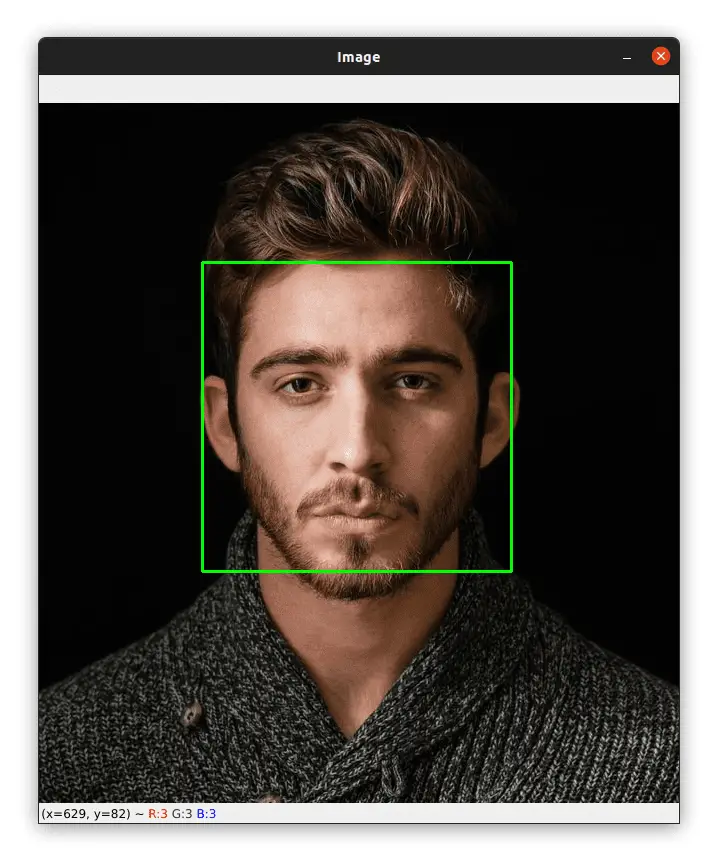
As you can see, the algorithm detected the face successfully.
Let's try another image:
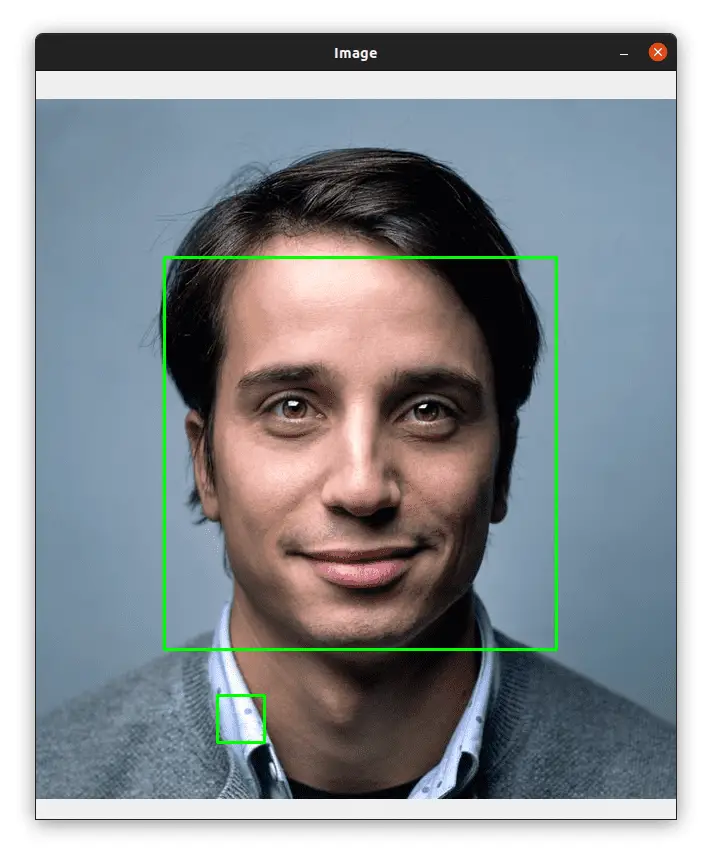
The face was correctly detected but you can see a false positive detection at the bottom left.
You can manually tune the parameters of the detectMultiScale function to remove the false positive detection. False positive detections are one of the drawbacks of Haar cascades and you have to manually tune the parameters of the detectMultiScale function to remove them.
Face Blurring
Now, we are going to blur the part of the face. In order to do that, we need to (1) find the region of the face in the image, (2) apply blurring to that region, and (3) replace the region of the face with the blurred part.
Let's see how to do it:
face_rects = face_detector.detectMultiScale(gray, 1.04, 5, minSize=(30, 30))

# go through the face bounding boxes
for (x, y, w, h) in face_rects:
    # get the region of the face
    face_roi = image[y:y + h, x:x + w]

    # apply blurring to the part of the face
    blurred = cv2.medianBlur(face_roi, 99)
    # replace the part of the face with the blurred image
    image[y:y+h, x:x+w] = blurred

cv2.imshow("Image", image)
cv2.waitKey(0)
Once again, we loop over the face bounding boxes, then we use Numpy slicing to get only the part of the face from the image.
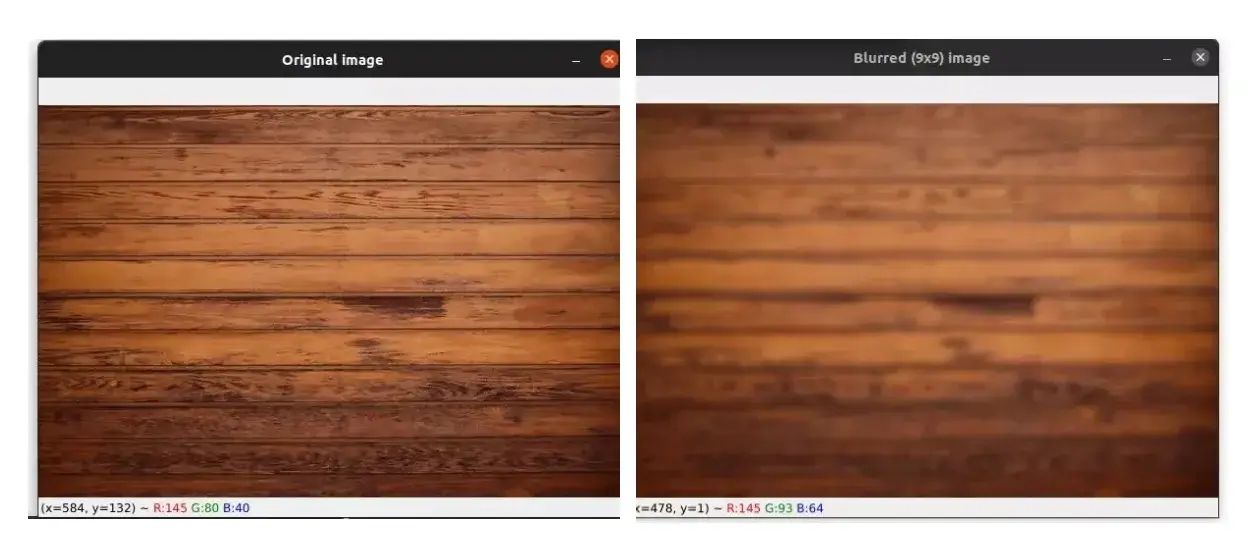
Next, we apply blurring to the part of the face making sure to use a very large kernel size (99) to get a very blurry image.
Finally, we used Numpy slicing again to replace the part of the face with the blurred part.
The image below shows the result of blurring the face:
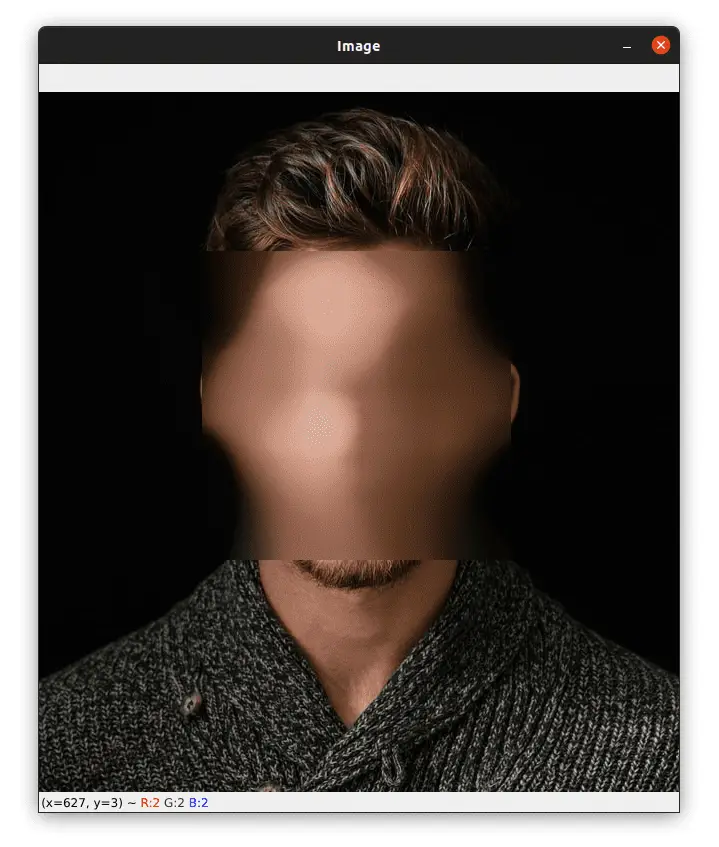
The face was blurred correctly but we are using a rectangle to blur the part of the face. It's ok, but it will be better to do it with a circle; we will see how to do it in the next section with videos.
Face Detection and Blurring on videos
Face Detection
Now that you know how to detect faces in images, let's see how to do it in videos:
import cv2
import numpy as np

video_cap = cv2.VideoCapture(0)
face_detector = cv2.CascadeClassifier("haarcascade_frontalface_default.xml")
This time, we are importing the Numpy library which we will use later for the blurring part.
Next, we initialize the video capture and load the Haar cascade face detector.
Now, let's loop over the frames:
while True:
    # get the next frame, resize it, and convert it to grayscale
    succes, frame = video_cap.read()
    frame = cv2.resize(frame, (640, 640))
    gray = cv2.cvtColor(frame, cv2.COLOR_BGR2GRAY)

    face_rects = face_detector.detectMultiScale(gray, 1.04, 5, minSize=(30, 30))

    for (x, y, w, h) in face_rects:
        cv2.rectangle(frame, (x, y), (x + w, y + h), (0, 255, 0), 2)

    cv2.imshow("frame", frame)
    # wait for 1 milliseconde and if the q key is pressed, we break the loop
    if cv2.waitKey(1) == ord("q"):
        break

# release the video capture and close all windows
video_cap.release()
cv2.destroyAllWindows()
We grab the next frame from the video capture, resize it, and convert it to grayscale.
Next, we perform face detection using the Haar cascade face detector.
Then we go through the face bounding boxes, draw a rectangle around the face on the frame, and finally, display the frame and wait for the q key to break the loop.
The video below shows the result of the Haar cascade face detector:
You can see that the face detector is running in real-time without any problem but there are several false positive detections.
The Haar cascade detector may not be as accurate as newer, more modern face detectors and can make occasional false positive detections but it runs fast and can even run in real-time.
Face Blurring
Let's see now how to apply blurring to the face in a video. This time, we're going to blur a circular area instead of a rectangular area like we did before.
while True:
    # get the next frame, resize it, and convert it to grayscale
    succes, frame = video_cap.read()
    frame = cv2.resize(frame, (640, 640))
    gray = cv2.cvtColor(frame, cv2.COLOR_BGR2GRAY)

    face_rects = face_detector.detectMultiScale(gray, 1.04, 5, minSize=(30, 30))

    for (x, y, w, h) in face_rects:
        # define the center and radius of the circle
        center_x = x + w // 2
        center_y = y + h // 2
        radius = h // 2
As before, inside the while loop, we get the next frame, resize it, convert it to grayscale, and perform face detection.
Next, we loop over the face_rects list and define the center of our circle and its radius.
The center of the circle will be the center of the bounding box. This is why we used the (x,y) coordinates, the width, and the height of the bounding box to get the center and radius of the circle.
Let's now see how to blur the circular region around the face:
        # create a black image with the same dimensions as the frame
        mask = np.zeros((frame.shape[:3]), np.uint8)
        # draw a white circle in the region that
        # matches the region of the face in the frame
        cv2.circle(mask, (center_x, center_y), radius, (255, 255, 255), -1)
        # Apply blurring to the whole frame
        blurred = cv2.medianBlur(frame, 99)
        # reconstruct the frame by taking:
        # - the pixels from the blurred frame if mask > 0
        # - otherwise, take the pixels from the original frame
        frame = np.where(mask > 0, blurred, frame)

    cv2.imshow("frame", frame)
    if cv2.waitKey(1) == ord("q"):
        break

# release the video capture and close all windows
video_cap.release()
cv2.destroyAllWindows()
We create a black mask image with the same dimensions as the frame and draw a white circle using the coordinates of the circle we defined before.
Next, we apply blurring to the current frame and then reconstruct the original frame using the np.where function.
This function takes the elements from the blurred frame if the condition (mask > 0) is satisfied, otherwise, it takes the element from the original frame (the pixels in the mask image are greater than 0 only in the circle area).
This will allow us to get all pixels from the original frame except the circular region around the face which we get from the blurred frame.
Summary
You can use other pre-trained Haar cascades to detect other objects like cars, cats, eyes, etc.
Haar cascade is one of the oldest algorithms for object detection, it's not the most accurate algorithm and is known for false positive detections (detect a face when there is no face in the image) but it's very fast and can easily run in real-time.
If you want to learn more about computer vision and image processing then check out my course Computer Vision with OpenCV and Python.
You can get the source code for this article by clicking this link.
If you have any questions or want to say something, please leave a comment in the section below.
Related Tutorials
Here are some related tutorials that you may find interesting:
Previous Article
Morphological Operations with OpenCV and Python
Next Article